Choosing Binoculars for
Astronomy
Introduction
When I was a child many popular astronomy books of the time
recommended starting off with binoculars. I tried it, but quickly moved on to a
telescope, so it’s only in recent years that I’ve started to really
enjoy using handheld binoculars for astronomy.
There’s no doubt that under a dark starry sky,
astronomy with a simple pair of handheld binoculars can be one of the most
pleasurable ways of enjoying this hobby: it’s simple and immediate.
Swapping between naked eye and binoculars you can appreciate the beauty of the
whole sky and I know of no better way to learn your way around the
constellations. You can make an evening of it, seeking DSOs with a red torch and
star charts to guide you, or just pop out for fifteen minutes to catch a few
highlights.
So which binoculars should you choose? In some ways this is
quite a difficult question to answer and much has been written about it in the
online forums, some of it good advice, some of it partisan rubbish from people
with a pet make, model or type. In the following paragraphs I’ll try to
take an objective (excuse the pun) look at buying hand-held binoculars for
astronomy.
Binoculars for Astronomy
Most hand-held binoculars are designed for birding, not
astronomy. Mostly a good birding binocular makes a good astronomy binocular as
well, but in some cases the requirements do differ. For example, many birding
binoculars are waterproof, but this isn’t exactly necessary for astronomy
(although if you accidentally leave them on the lawn overnight, it might be)! A
good birding binocular needs quick focusing, but this isn’t essential for
astronomy either. Then again, for daytime use you rarely need objectives bigger
than 30-40mm: any more is just wasted because your pupil contracts and
effectively masks off (‘vignettes’) a larger objective. For
astronomy, though, your pupil is bigger in the dark, so you can benefit from
the extra light gathered by bigger objectives. So what characteristics should
you look for in binoculars for astronomy?
Objective size
To start with, let’s consider the two main binocular
characteristics: objective size and magnification. Binocular sizes are
generally quoted as magnification x objective lens size in millimetres, so that
10x50 means 50mm objectives with a ten times magnification. Hand-held
binoculars come in numerous sizes between 8x20 and 20x60.
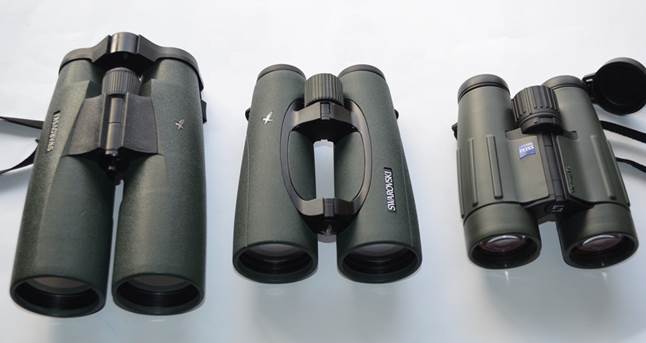
Three of many possible binocular sizes:
15x56, 12x50 and 7x42. These three pairs all work well for astronomy.
Apart from looking at the Moon, no binocular with lenses
smaller than 30mm are much use for astronomy and 40-50mm are better. Lenses in
the 50-60mm range may make the binoculars too heavy to hold for long, but may
just be worth it in terms of the brighter images you get and the fainter stars
and nebulae you can see.
Light gathering power is a function of the area of the lens,
so 56mm objectives (about the largest you get in a hand-held binocular) gather
twice as much light as 40mm objectives.
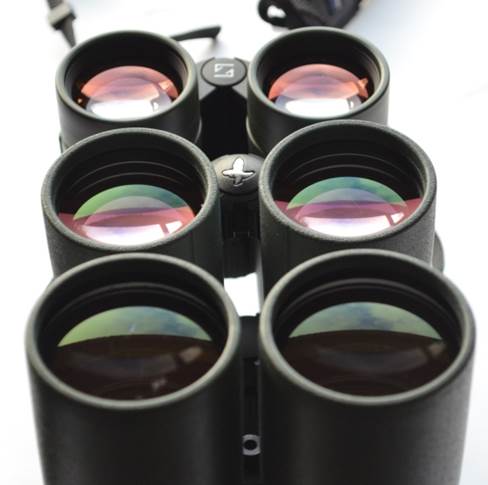
Binocular Objectives: 42mm, 50mm and
56mm
Power
In terms of magnification, 7x used to be the recommended
power for astronomy and a good 7x binocular does give a wide, steady view. But
in modern light-polluted skies, 7x and even 8x are too low, tending to
accentuate sky glow from city lights, unless you live under very dark skies. Such
a low power will also make it hard to find smaller deep sky objects like
nebulae and globular clusters, which are easy to find with say a 12x
magnification. Magnifications of 10x and above also give a much more involving
view of the Moon.
About 12x is the comfortable maximum that most people can
hold without shakes blurring the view too much, but you might just get away
with 15x if you have a steady hand or lean on a convenient wall (or bush, car
etc!) for extra support. Anything above 15x would need some kind of mounting.
In
short, 10x50 is an ideal binocular size ideal for a beginner,
but you might eventually find that the effort of using say 12x50s or 15x56s is
worth it for the more involving views you get.
The
effect of exit pupil for older users
The size of the exit pupil of a binocular – the little
round bright image of the objective you see in the eyepiece – is simply
the objective size divided by the power. For a 7x50 (the size often recommended
in older books) the exit pupil is thus about 7mm in diameter. But this is a
problem. Only younger people’s pupils can open that wide; older people
can manage perhaps 5-6mm. So if
you’re over forty and buy 7x50s, you are effectively wasting aperture and
7x40s will seem just as bright!
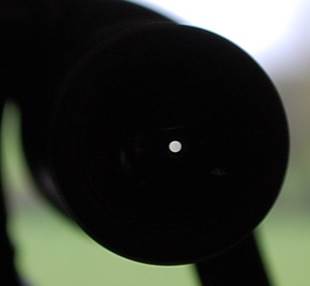
Binocular exit pupil
Field of view
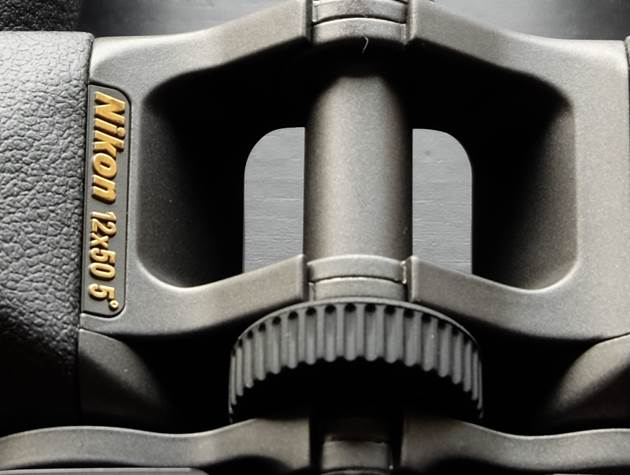
Nikon 12x50 SEs - 5 degree true field
of view
A wide apparent field of view is preferable (I like 60
degrees or more, to avoid that “looking through a straw” feeling),
but avoid very wide fields as you often get a lot of distortion at the edges. Some
birding binoculars deliberately leave in some field curvature for comfortable
panning, but this isn’t ideal for astronomy, where a flat field makes
viewing extended objects like star fields more satisfying. A bright flat narrow
field is actually better for astronomy than a wide, dim curved one. But
consider that a high magnification and a small true field may leave you looking
at such a tiny patch of sky that it’s difficult to find things!
All-in-all
a moderate field of view may work best for astronomy – something like 6
degrees in a 10x binocular. However, some premium designs, like
Swarovski’s EL 12x50s offer a bit more whilst still having a wide,
well-corrected view across the whole field.
Eye Relief
Eye relief is the distance behind the eyepiece lens at which
the image is formed. Short eye relief means you have to press your eye right up
to the eye lens.
This is an area where a lot of older binos
with simple (Kellner type) eyepieces fall short. If you wear glasses then you’ll want good eye relief – 14mm is about minimum for glasses
wearers and 16mm is better.
I recommend trying before you buy, not least because as far
as eye relief is concerned the size of a millimetre seems to vary widely between
manufacturers!
Binoculars with a lot of eye relief need eye cups to allow
for people who wear glasses (eye cups in) and those who don’t (eye cups
out). Click-stop adjustable eye-cups are much easier to use than the older
rubber fold-down type.
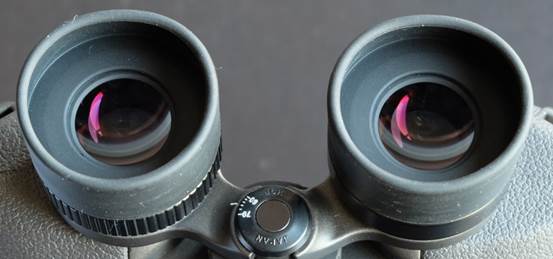
Eye cups extended for use without
specs.
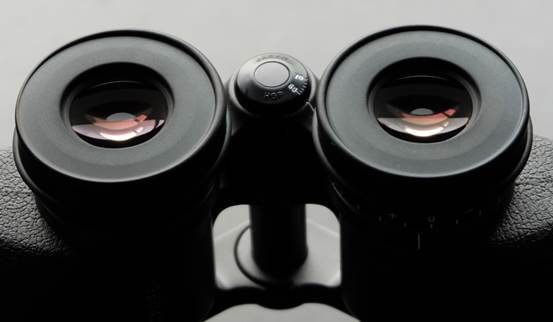
Eye cups folded back for specs wearers
Optical Quality
Good optical quality is very important. A good easy test of
overall optical quality, as with telescopes, is focus snap – best focus should
be easy to obtain, crisp and definite. If you find yourself fiddling around
trying to get best focus, buy a different pair.
Modern binoculars should have multi-coatings. These mean
that they transmit a lot more light to your eye and this makes a big difference
for astronomy. Reflect a bright light in the objectives: the reflection should
look dim purplish or greenish and the best coatings make the lenses almost
disappear. Whilst you are at it, look at the interior of the barrels –
the best will have ridge baffles or very matt black paint to cut out unwanted
reflections.
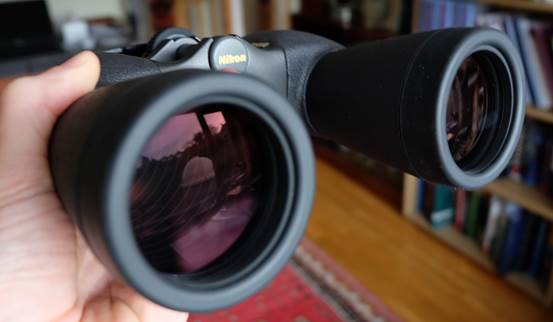
These Nikons have excellent coatings
and barrels with ridge baffles
Point the binocular to one side of a strong light source
– a streetlamp or the Moon, NOT the Sun - to check for internal reflections
which are annoying and reduce contrast: if the view becomes washed out or
strong reflections (“ghosts”) appear, don’t buy. The
“Jupiter” test is another good one. Focus on a bright planet and you
should see a well-defined tiny disk with little smearing or flare of the light;
anything else means the binoculars are of poor quality.
Chromatic aberration (“CA” - colour fringing
around bright objects) occurs because the lenses don’t bring all colours
to the same focus. During the day you can check this by focusing on something
with high contrast (tree branches against a bright sky, for example) and look
for purple or green fringes. Most binoculars show modest CA, and this
isn’t so much of a problem for astronomy, unless it is severe or you like
looking at the moon, but very bright false colours are bad news.
Finally, avoid zoom binoculars as these are typically poor
optically (Leica’s expensive dual-power Duovids
excepted).
Roofs vs Porros
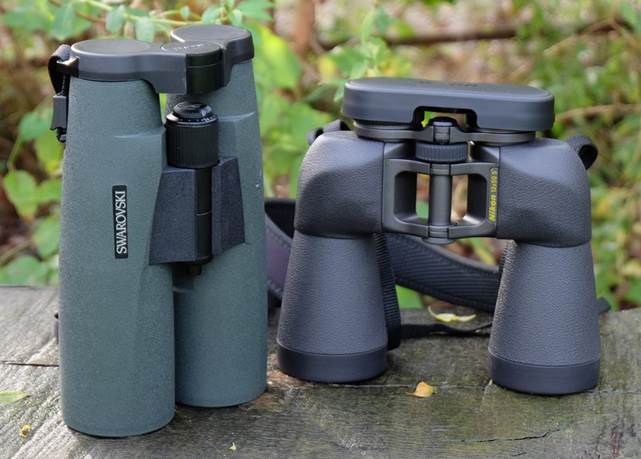
Roof and porro-prism binoculars
There are numerous different makes and designs of binocular,
but they fall into one of two main types: porro prism and roof prism (all
binoculars apart from the simplest opera glasses contain prisms to turn the
image the right way up). Roof prism binoculars are the more
“modern” type with straight barrels, porros
being the traditional type with “shoulders”.
Roof prism binoculars (“roofs” from now on) have
the advantage of being generally smaller and easy to hold, what’s more
they have internal focusing so it’s easier to make them waterproof. Hold
on! Before you rush out to buy a pair of roofs, know this: for a given level of optical performance, roofs are about twice as
expensive as porros (if not three times) and no cheap
roof prism binoculars are much good.
So,
for astronomy you don’t need roofs!
That’s not to say that a top-quality pair of roofs from
the likes of Zeiss, Leica, Nikon, Swarovski et al won’t be good for
astronomy, it’s just that high quality porros
may be just as good, but much
cheaper. The problem is that very few high quality porro prism binoculars are
made any more.
Which Make and Model: Cheap ‘n’ Chearful
or High-End Quality?
The first thing to understand is that pretty much nobody
makes top-quality hand-held binoculars specifically for astronomers. Smaller
binoculars are designed for nature viewing and birding, larger ones almost
exclusively for hunting.
With binoculars, you mostly do get what you pay for and
whilst the more powerful roofs (10x plus) from any of the top manufacturers
(Zeiss, Nikon, Leica, Swarovski) will be great for casual astronomy, they will
all set you back the thick end of two thousand pounds new. However, with these binos you will get pretty much everything: light weight, brilliant,
sharp images with a reasonably wide field of view, complete waterproofing and
plenty of eye relief together with twist-and-click eye cups for easy use with
glasses. In fact, if you are used to cheaper binos
and don’t find them very interesting, the fabulous images from these
models may really surprise you!
But what if you don’t have a thousand pounds plus spare
for a pair of binoculars and don’t need the ruggedness and waterproofing
of top roofs? The answer, of course, is a good pair of porros.
In theory and in practice even the best roofs can’t quite match the
clarity and light transmission of the best porros
(Zeiss’ abbe-prism models possibly being an exception), so you
don’t have to be losing out in optical terms. Trouble is there
aren’t that many really good porro prism binoculars out there, because
most birders and hunters go for the waterproof ruggedness and slim design of
roofs.
Probably the best small porro binoculars are Nikon’s
Superior E line, which are superb optically and mechanically, but are not
waterproof. These can be had in 8x32, 10x42 and 12x50 sizes. Both larger sizes
work well for astronomy. The Superior E line has been discontinued, but as I
write (December 2014) you can still get the 12x50s.
Alternatively, Fujinon’s
10x50 FMT-SX and FMTR-SX (the “R” means rubber-covered, otherwise
they are the same) are excellent optically and waterproof as well, but much
heavier than the Nikons.
Image Stabilising (IS) Binoculars
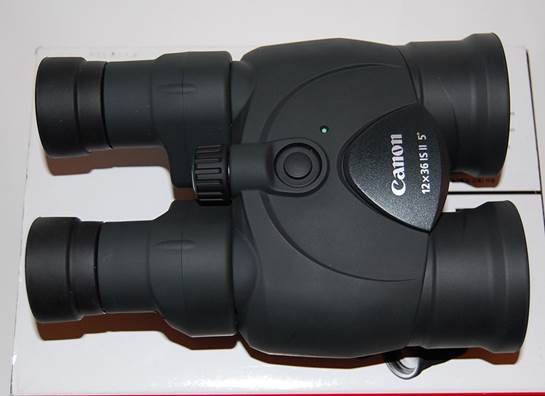
Canon’s 12x36 Image Stabiliser
Binoculars
The biggest limitation for hand-held binos
is the shakes that your body will always impart, however steadily you hold them.
Enter, from the mid-nineties, image stabilising (I.S.) binoculars. These come
in various different designs, from passive ones using suspended prisms and
needing no batteries (Zeiss 20x60), to gyro-stabilised designs (Fujinon) and
ones using a computer to control special prisms which adjust the light path
every millisecond (Canons). By far the most popular are the Canons and I have
personally owned and reviewed the 10x30s and 12x36s (reviews elsewhere on this
site).
I really liked the Canon 10x30s for astronomy – basically
you just push a button on top and seconds later the image steadies and the
resolution dramatically improves; it’s really as simple as that. Even the
10x30s will resolve more detail than non-stabilised binos
(albeit with less brightness than good 10x42s) and I used them as just about my
only astronomy tool for 18 months when I was living abroad. However, the 18x50s
I tried suffered from some strange effects in use, like changing focus very
slightly from moment to moment, although the level of detail they offered was
amazing. Try before you buy.
Summary
Ten top tips for selecting hand-held astro’ binos:
1) Power: 10-12 (15-18 with some support or I.S.)
2) Aperture 40-60mm.
3) Weight: Under 1000g is best unless you’re built
like The Terminator. Take 1500g as the absolute maximum.
4) Eye relief: minimum of about 14mm for glasses wearers;
16mm is better.
5) Click-stop eye cups are more convenient than the fold
down type for glasses wearers.
6) Always go for full multi coatings as they yield a much
brighter image. Avoid binos made before the mid
Eighties, as they will have single coatings.
7) Make sure any roofs you buy have ‘phase
coatings’; porros don’t need them.
8) Roofs will always be much more expensive than porros for the same optical quality, so don’t buy
cheap ones: buy porros if your budget is limited.
9) Don’t buy zooms (Leica Duovids
– dual powers, not zooms – excepted).
10) Always try before you buy if you can, as comfort when
holding and eye relief requirements can vary a lot from person to person.
Best Buy
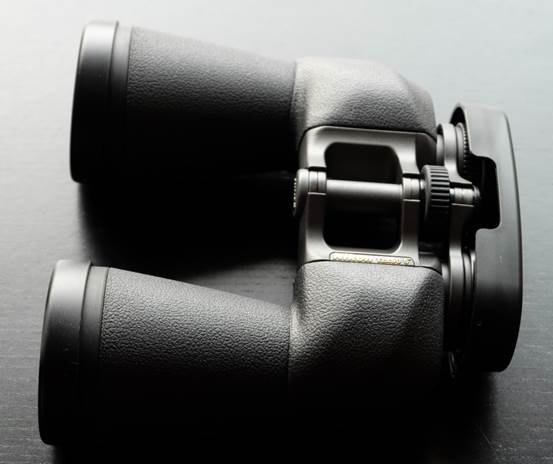
Finally, if you want my specific recommendation for an
astronomy binocular, ScopeViews’ best buy is
Nikon’s 12x50 SE. These have (very sadly in our view) been discontinued,
but you may still be able to buy them here: