Fujifilm X-Trans Camera (X-M1) Astro-Photography Review
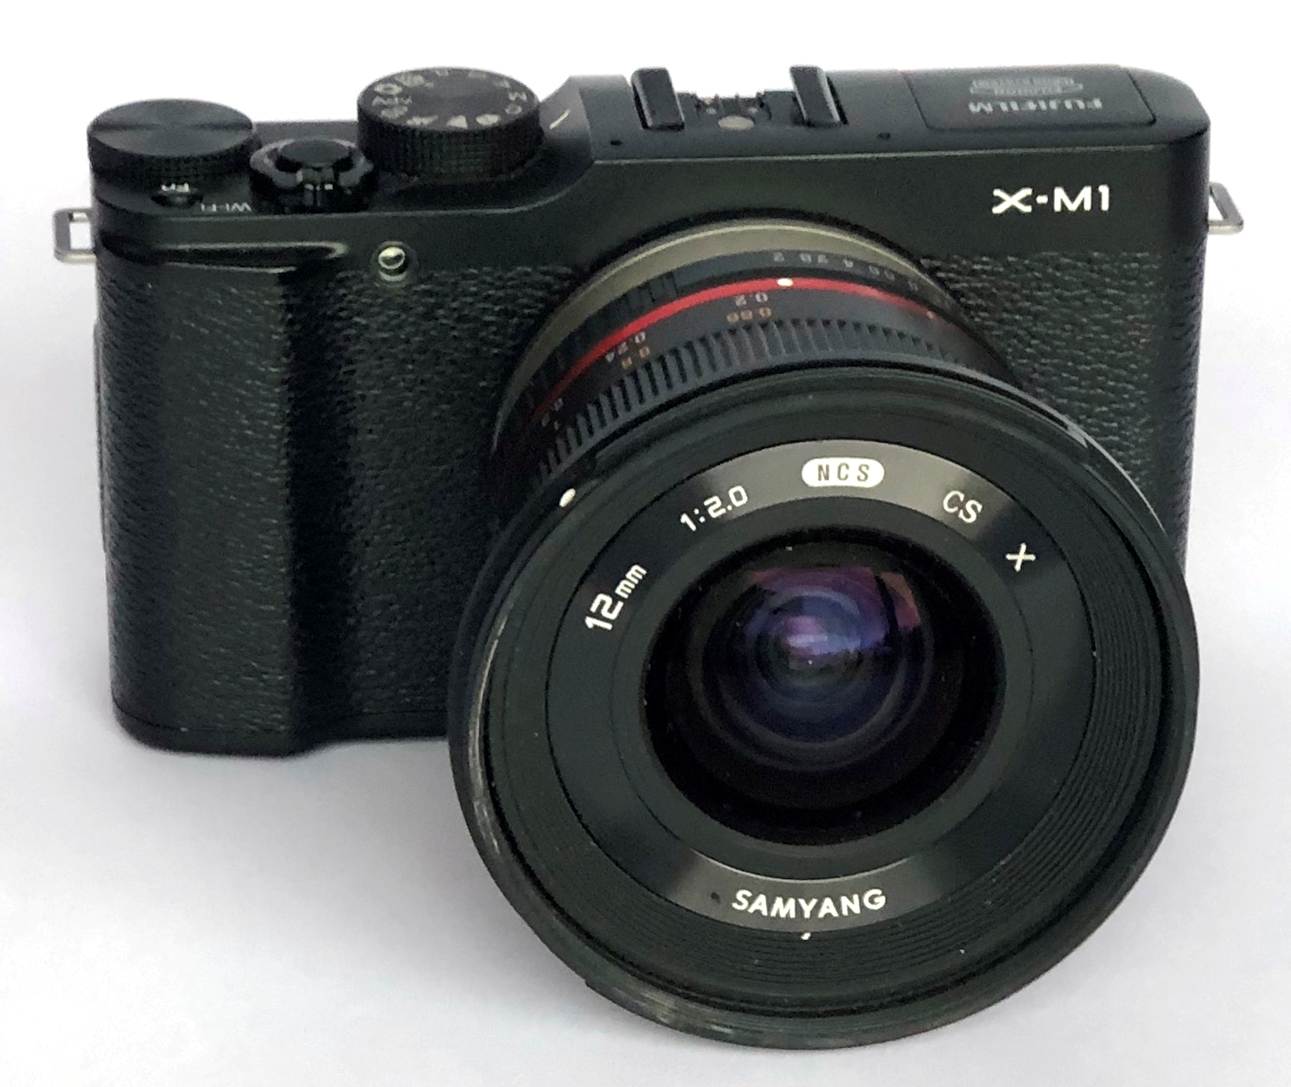
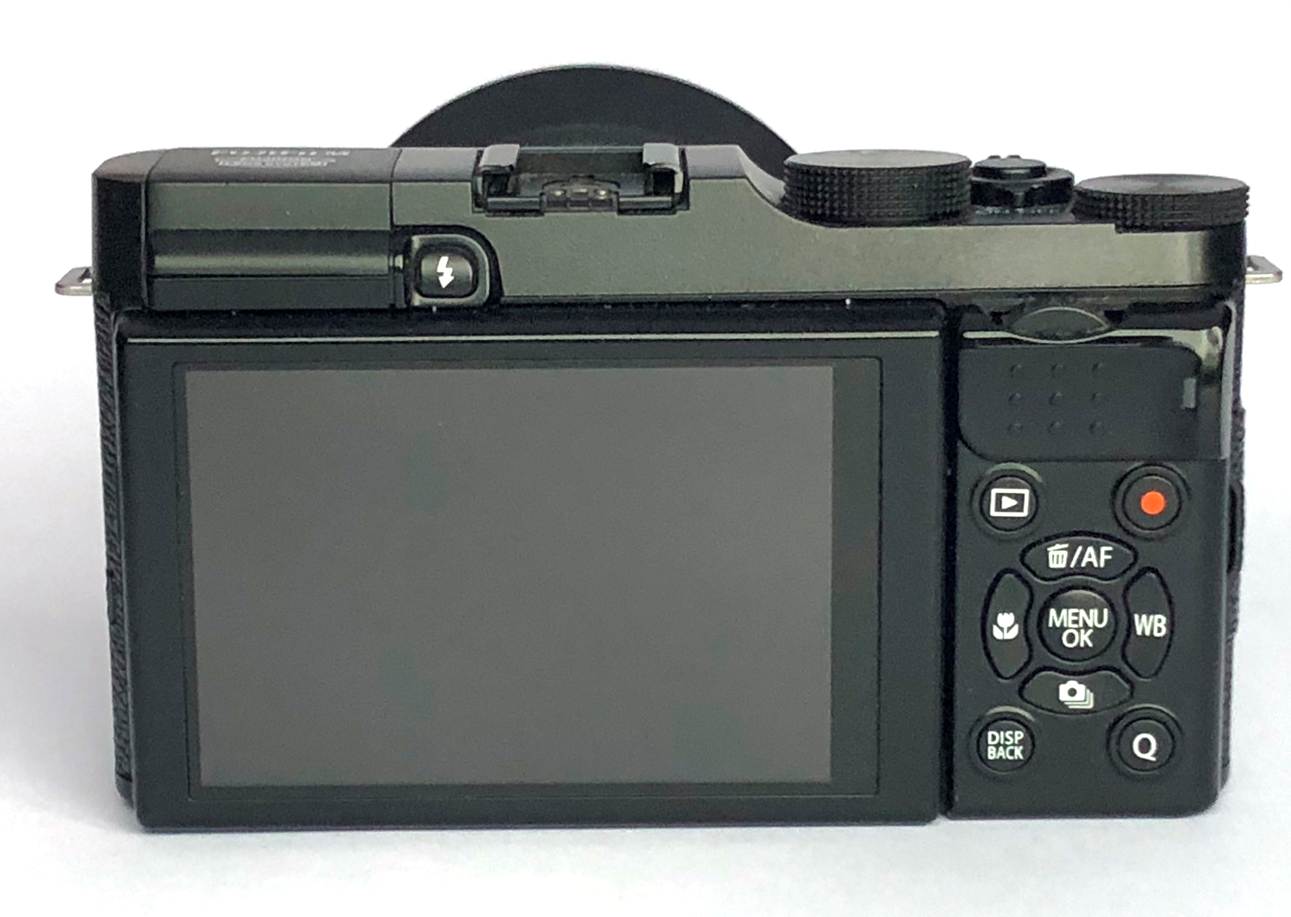
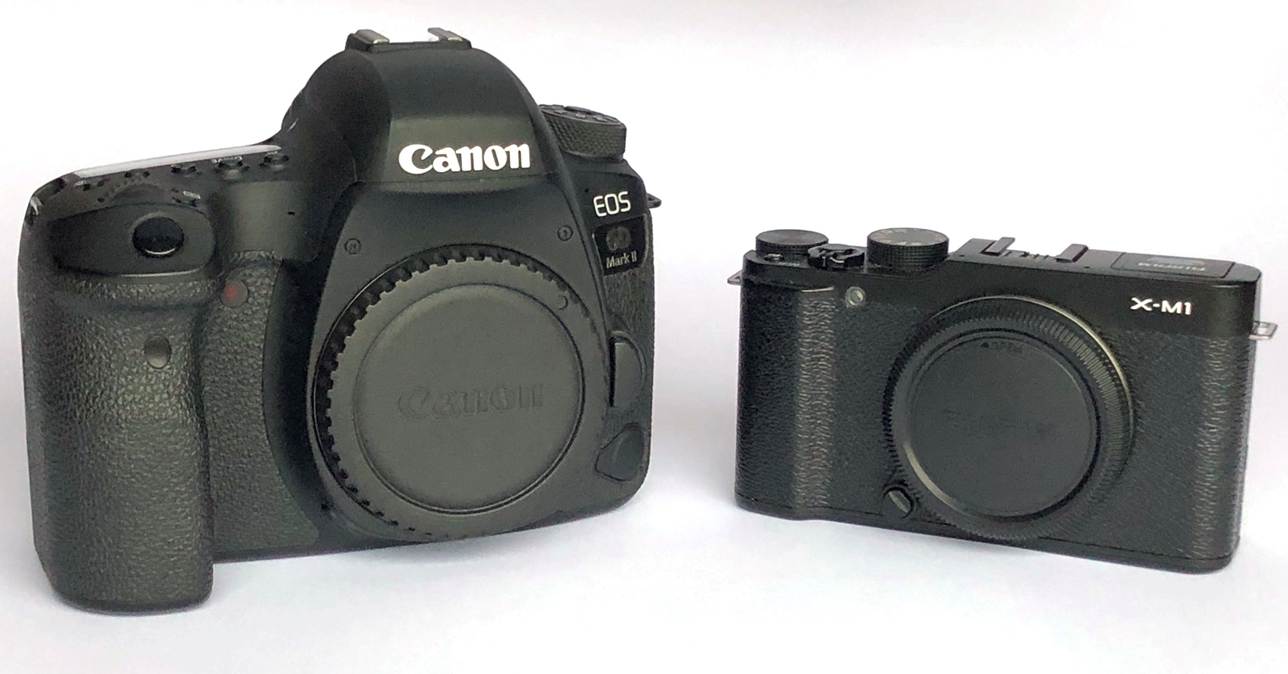
Fuji X-M1 is tiny compared to an EOS 6D.
Note: I wrote this brief review a few years back, but
it’s still relevant because Fuji just don’t make a cheap X-Trans
body like the X-M1 anymore. All their smaller cheaper models are conventional
APS-C, all the way up to and including the X-T100. So if you want to try
X-Trans in a cheap lightweight body, the X-M1 still makes a good choice.
The digital takeover happened quickly. I recall seeing my first digital camera,
owned by a guy from Hong Kong and only capable of storing about twenty
single-megapixel shots, on a business trip to Malaysia in 1997. Five years
later digital was mainstream and Fuji’s film business must have been in
deep trouble.
Around then Kodak went bust. I suspect few would have bet on
Fuji surviving, but they did, by concentrating on the bit of the camera they
had always specialised in, the bit that detects the light. Only now that
wasn’t a film anymore, but a sensor.
So when Fuji announced their new X range of compact cameras a
few of years ago, they fitted a revolutionary sensor aimed at the best possible
low-light performance, image quality and colour rendition – the very same
things that Fuji had always done with its emulsions like Provia
and Velvia. The new cameras even had dedicated modes for simulating those
famous Fuji films.
So partly I wanted an X camera because it simulated the
Velvia film I loved for landscapes. But even more I wanted one for
astrophotography, because the sensor in an X camera has another trick up its
sleeve: some of the best low-light, low-noise performance around.
Problem was, X-series cameras were expensive, aimed at
pro’s and enthusiasts. Then last year, Fuji brought out the X-M1, a
relatively cheap compact-system camera that looks conventional enough; except
that inside is the same, quite revolutionary sensor that made the other
X-series so special.
I can tell you now that the humble-looking X-M1 takes
excellent daytime photos, living up to its reputation. But how does it fare for
landscape astrophotography or plugged into a telescope?
Extensive reviews of the X-M1 for
daytime use are everywhere, so here I’ll concentrate on using it for
astrophotography and gloss over stuff like AF functionality, special effects
and so on.
Design and Build
Body
The X-M1 looks a lot like the other X-series models, the
X-T1, X-Pro1, the X-E2 and the X100, but smaller. Fuji have kept it small (and
the price low) by doing away with the viewfinder completely, but installing a
high-res’ screen that (crucially for me) tilts like the one on the
range-topping X-T1.
The lens mount is the same proprietary one used by the rest
of the range. A good selection of lenses (some of class-topping optical
performance) is available, at least two of which make excellent landscape
astrophotography lenses (more on that in a later review). And a T2 adapter for
the X-series mount is widely available for tracked astro-imaging.
The other reason the X-M1 is light and cheap is that
it’s partially made of plastic, but build quality appears identical to
all but the highest models (the XT-1, XT-2 and XT-3). It certainly seems
identical to a recent X-T30 I tried.
No, the X-M1 isn’t made in Japan either (Thailand for
my example), but build quality is excellent and the control knobs at least are
metal to give classy feel in use. It’s lasted very well too.
Crucially, inside the X-M1 is the
crucial 90% of an X-T1 for a real world cost of perhaps a quarter.
Another killer feature of the XM-1 for owners of small scopes
is its small size and low weight compared to a DSLR (even an EOS 100).
Sensor
The thing that is really special about any X-series camera is
the sensor. In order to create a niche in the market around their traditional
values, Fuji have come up with a genuinely radical design, so radical in fact
that the software used by industry-standard sensor rating website, DxOMark, allegedly can’t cope with it!
The Fuji X-trans sensor is an APS-C format CMOS sensor like
so many others, but it does colour rather differently. You can read about the
detailed technical ins and outs elsewhere. Here I’ll just say that it
does away with regular spacing for the RGB pixels, natively avoiding moiré
and so getting around the need for the usual softening Bayer filter in front of
the chip. The result, according to pretty much every reviewer, is unrivalled
resolution and sensitivity.
Note: Be aware that the identical
looking X-A1, X-A5 etc have a conventional Bayer sensor!
Controls
Even though the X-M1 lacks the dedicated thumb wheels for
shutter speed and ISO that the higher models have, it is still has good
provision for manual use, especially for what is essentially a compact camera.
In manual mode, the top thumbwheel is dedicated to shutter speed, the one on
the back to aperture, whilst the function button on top defaults to ISO. So you
have separate dedicated controls for all the main things you need for
astrophotography – good news in the dark!
The Fuji also has a ‘Q’ button that allows quick
access to all the major settings.
Another vital requirement for astrophotographers is magnified
live view focusing. The good news is that the X-M1 does have live view (though
it’s not called that). Unlike my last Nikon, where the live view has
staged magnification and a dedicated lever to enable it, on the mirror-less
X-M1 you just push down on the rear thumbwheel to get an instantly magnified
view for critical focusing.
Fuji’s version of live-view
works well for focusing with a telescope and makes critical focusing n bright stars easy.
Overall, the XM-1 may look like a
compact point-and-shoot camera, but it has all the controls you need for easy
use in manual mode.
ISO
The X-M1 has a conventional range of ISOs available from 100
to 6400 with a couple of high settings (12800 and 25600) that we won’t be
using because as with virtually all cameras they are noisy.
ISO 6400 doesn’t sound that special, but unlike many
DSLRs noise remains low at 6400, whilst at ISO 3200 noise is really low –
good for low light terrestrial, better for landscape and tracked
astrophotography.
In fact, for astro-imaging of all types, ISO 3200 is the
setting I use most.
It’s worth noting that in the years since the X-M1 came
out, Fuji have increased the megapixel count on its X-Trans cameras from the
X-M1’s 16.3 to 24 to 27, but retained the same maximum native ISO support
– smaller pixels mean more noise all things being equal.
Shutter Speeds
Again, shutter speeds are a conventional DSLR set: 30s to
1/4000s plus the vital Bulb for astrophotography. The higher-end models have
much higher maximum speeds, but not the X-M1. If you’re using one of
Fuji’s super-fast lenses, like the 23mm F1.4, this matters because you
can’t use full aperture in bright daylight, but for astrophotography
it’s irrelevant.
Some of the higher-end X-series models have a thread in the
shutter release button for an old-fashioned cable release; the X-M1
doesn’t, so you’ll need to buy an electronic one. Fuji’s own
RR-90 USB remote is expensive, but you can get copies for a tenner on Ebay that work fine.
The XM-1 doesn’t have a built-in intervalometer, but
…
In bulb mode, the XM-1 has a great
feature: it reads out the elapsed exposure time on the screen in big numbers,
so you don’t need a separate timer. One quirk though is that the recorded
exposure time is often a bit different, I have no idea why.
Stacking
If the story has been good so far,
it starts to come a bit unravelled when it comes to post-processing and the
same applies to any X-Trans camera.
Photoshop and PixInsight
do support Fuji raw files, but other software (including Maxim DL and Deep Sky
Stacker last time I tried) do not. This is precisely because of that non-bayer sensor and the fact that colour is encoded
differently.
For packages that don’t
support Fuji raw, you will need to use Fuji’s own software to convert
into a universal format like TIFF first. Even then you may still find problems.
I have written a separate article about this.
One positive thing to note is that
I’ve seen no evidence of the noise reduction ‘star-eating’
that Sony A7 variants suffer when used for astro-imaging. Noise reduction is
off by default on the X-M1.
If you can get around the stacking
issues, a Fuji X-Trans takes excellent tracked subs. Below is an example of M42
straight from the camera with no cropping or processing of any kind.
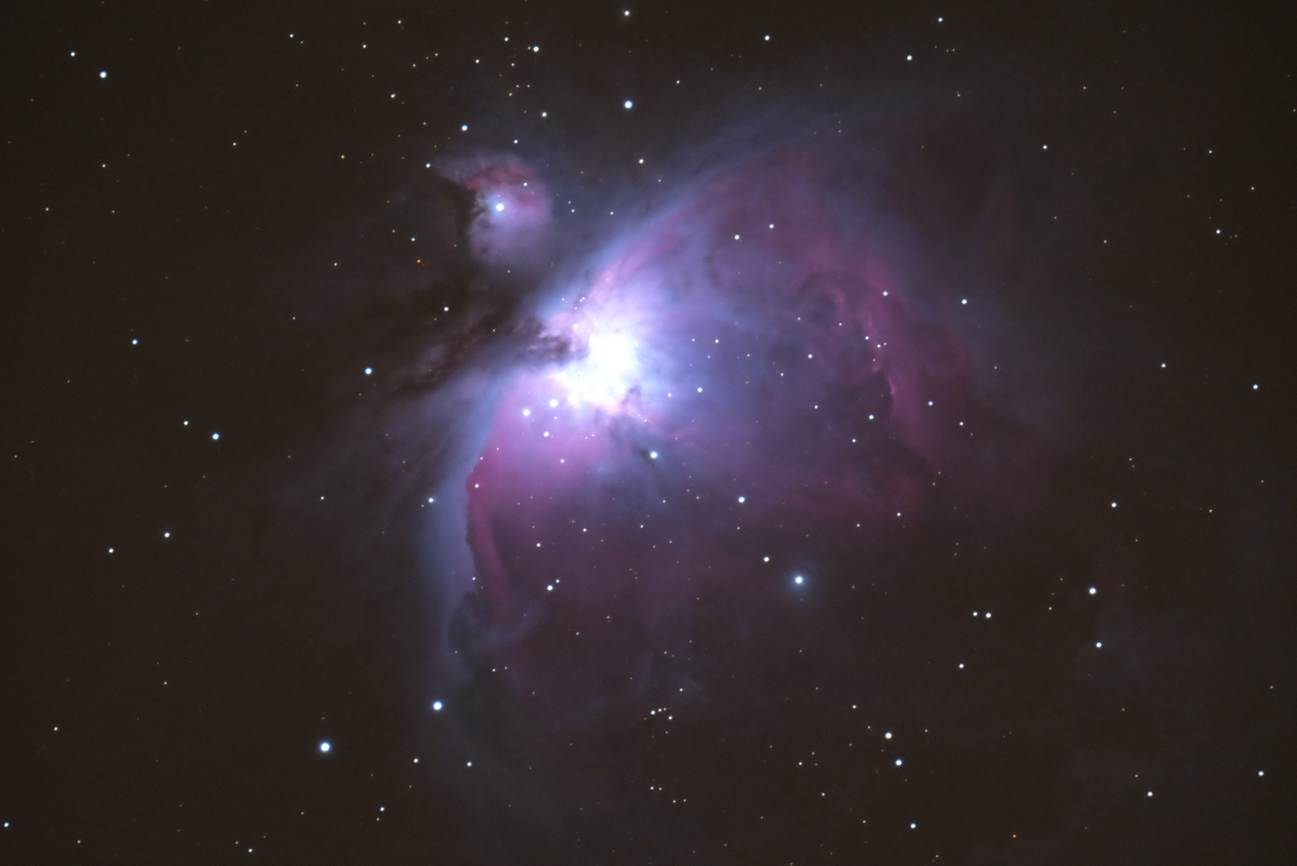
M42: Fuji X-M1, 1400mm F8 75s ISO
3200. Slight tracking error.
Landscape
Astrophotography
Stacking issues have meant
I’ve mainly used the X-M1 for landscape astrophotography with
Fuji’s own 16mm and 23mm F1.4 lenses and Samyang’s (Rokinon) 12mm F2 manual prime.
Higher-end X-Trans cameras
supposedly correct for lens aberrations on Fuji’s own primes
automatically, but the X-M1 doesn’t seem to. Consequently, the 23mm and
16mm have too much astigmatism and coma fully open to be ideal for
astrophotography – stars are very distorted towards the edge.
The Samyang 12mm F2 is by contrast
excellent in this respect (famously so – numerous reviewers have noted
it).
I’ve reviewed these lenses
separately, but a selection of images follow.
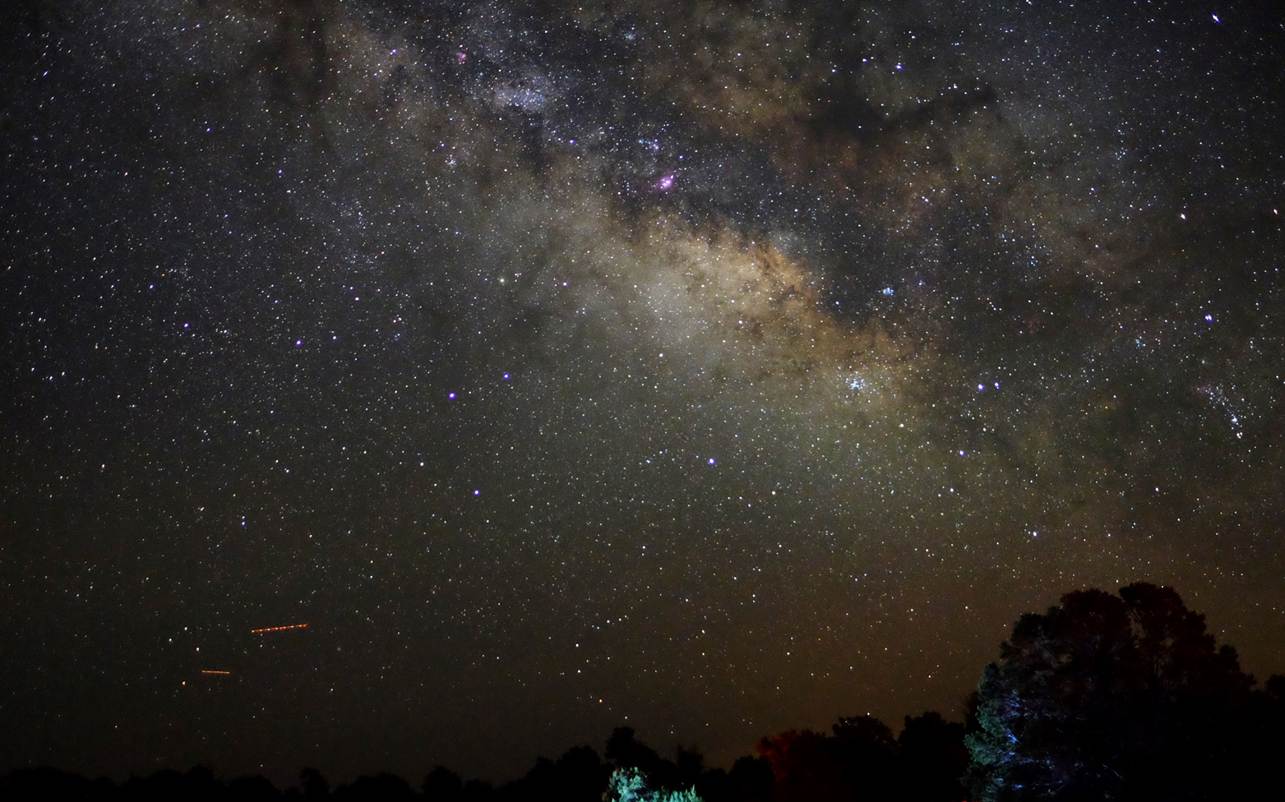
Milky Way from the Grand Canyon
– Fuji X-M1 + XF 23mm, 10s F1.4 ISO3200.
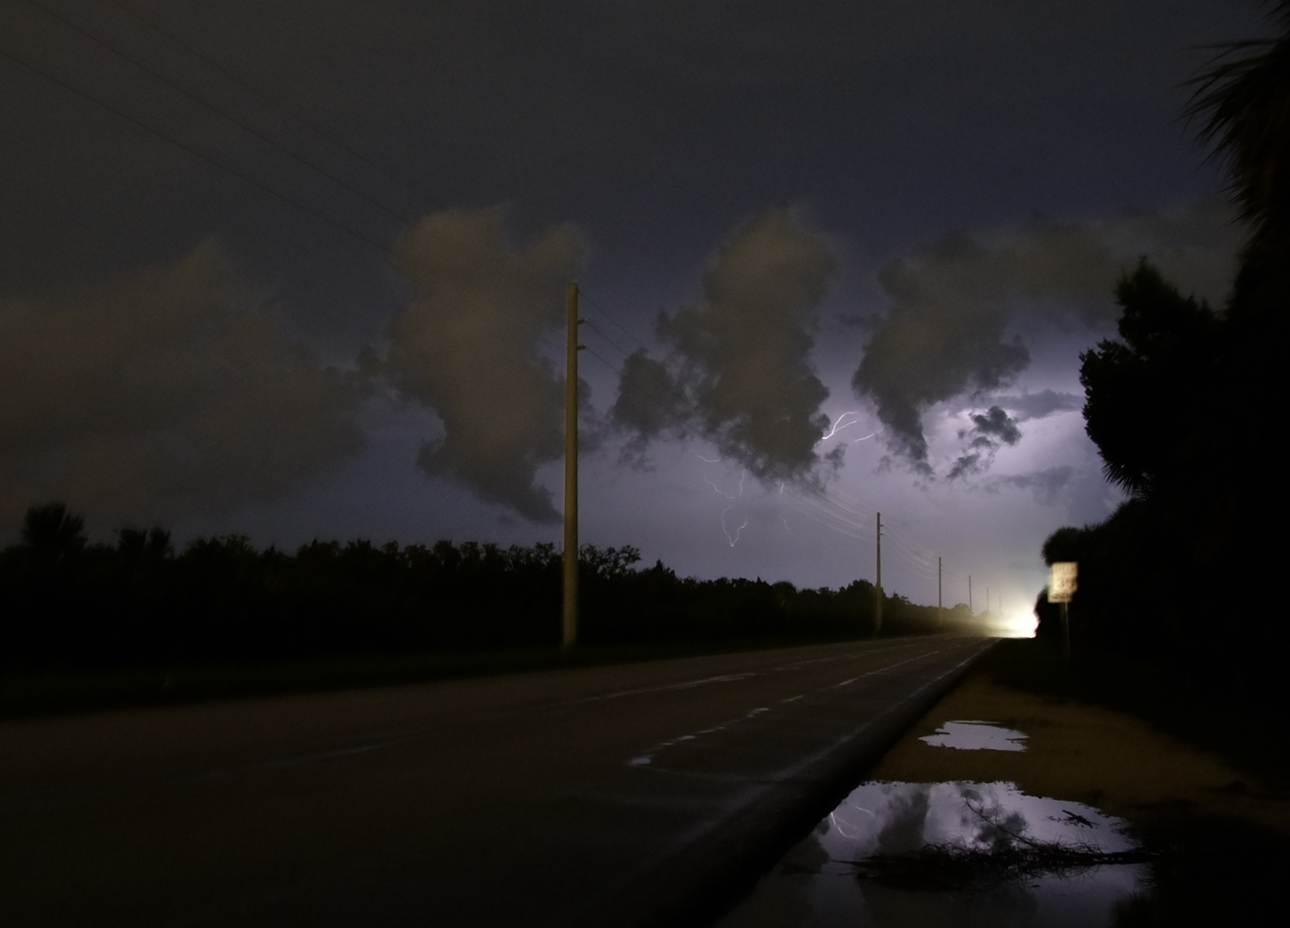
Cape Canaveral lighting storm - Fuji
X-M1 + Samyang 12mm F2, 30s F2 ISO 800.
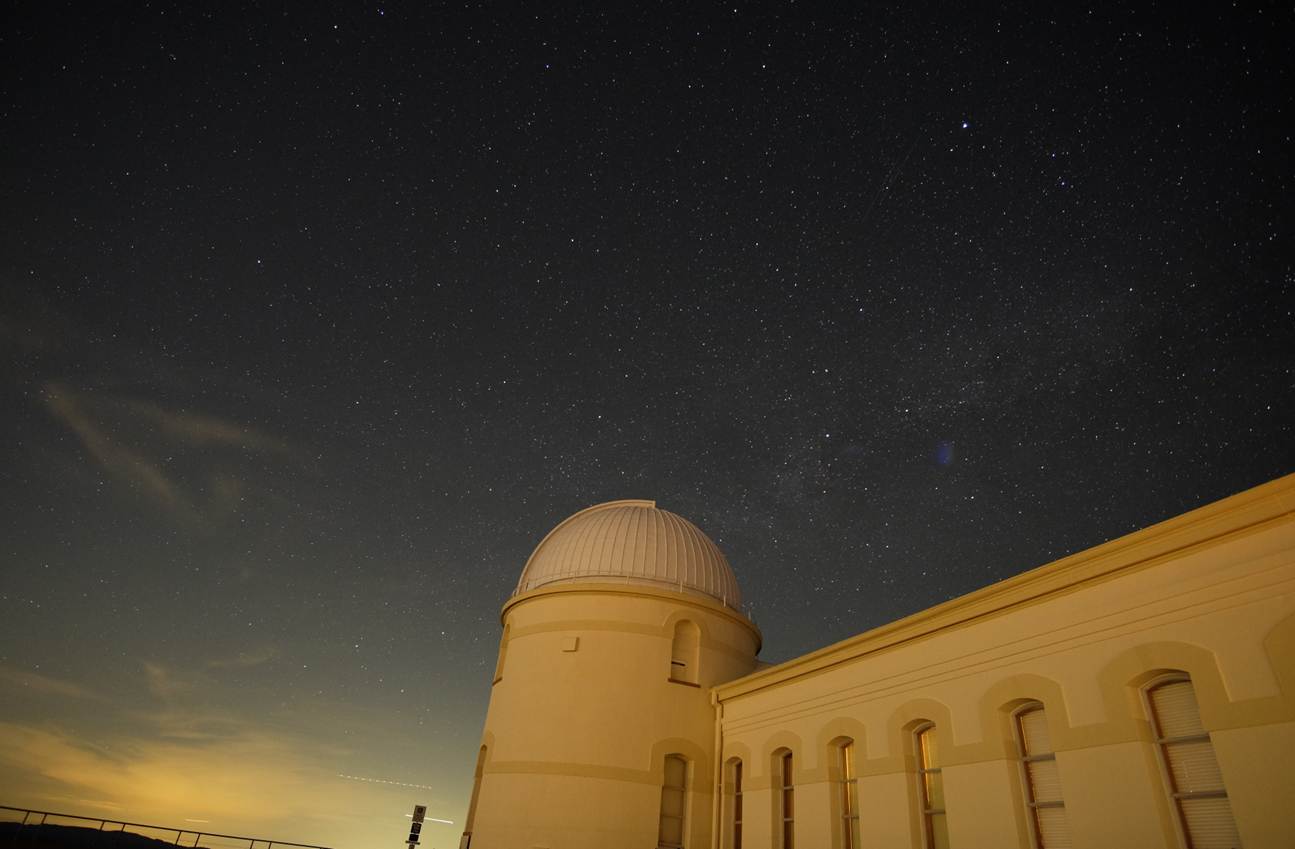
Lick Observatory in California - Fuji
X-M1 + Samyang 12mm F2, 20s F2 ISO 1600.
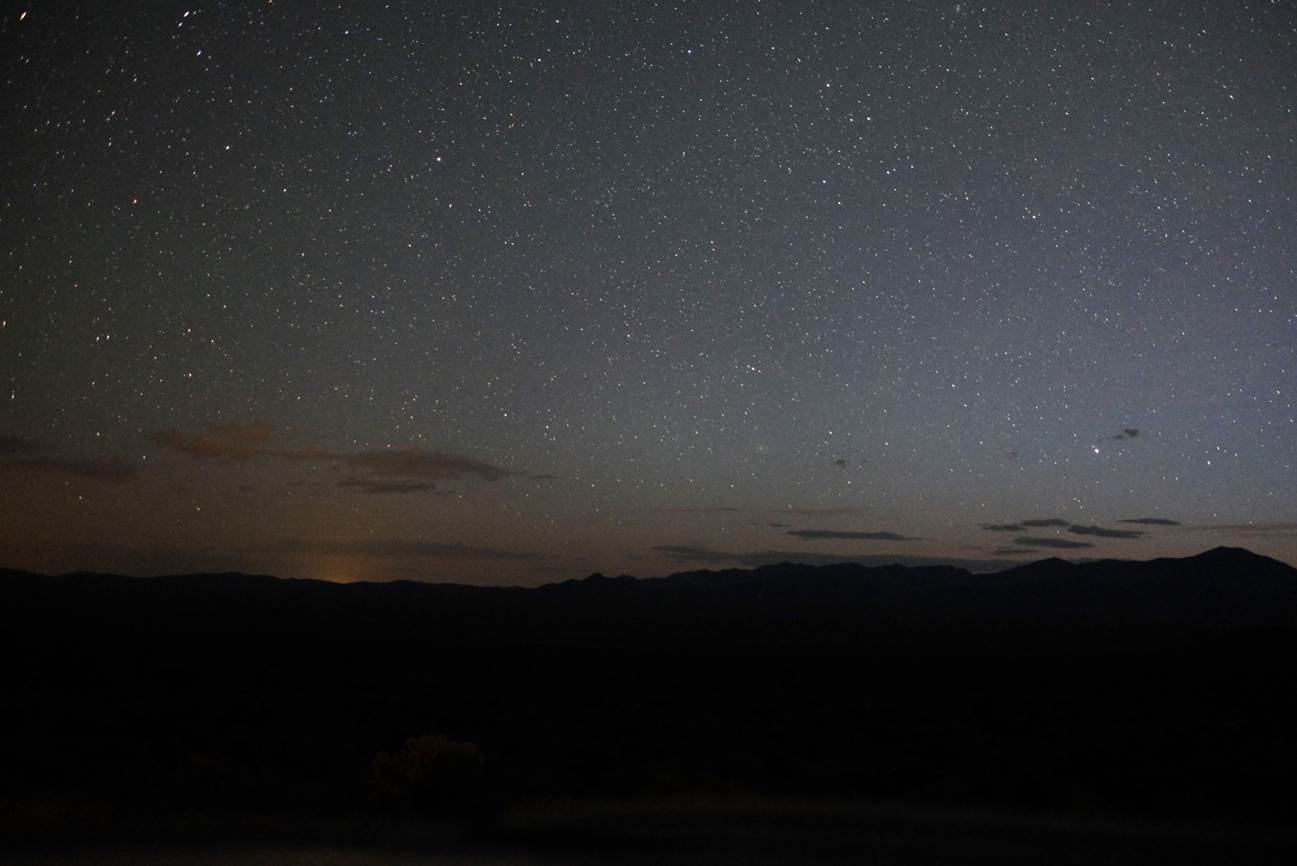
Area 51 sky glow from the ET
Highway, Fuji X-M1 + XF 23mm, 10s F1.4 ISO 2500.
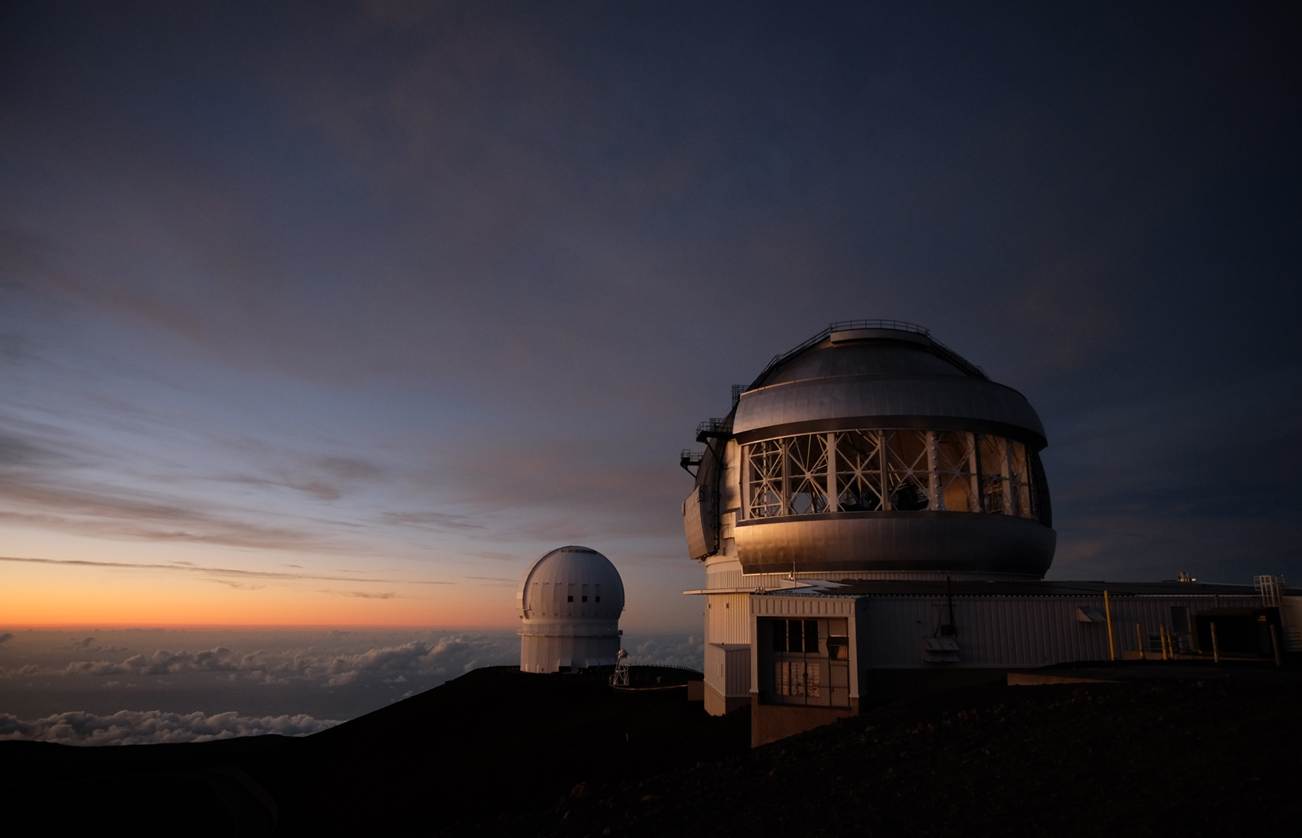
Mauna Kea sunset – Fuji X-M1
+ Samyang 12mm F2, 1/60th F2 ISO 800.
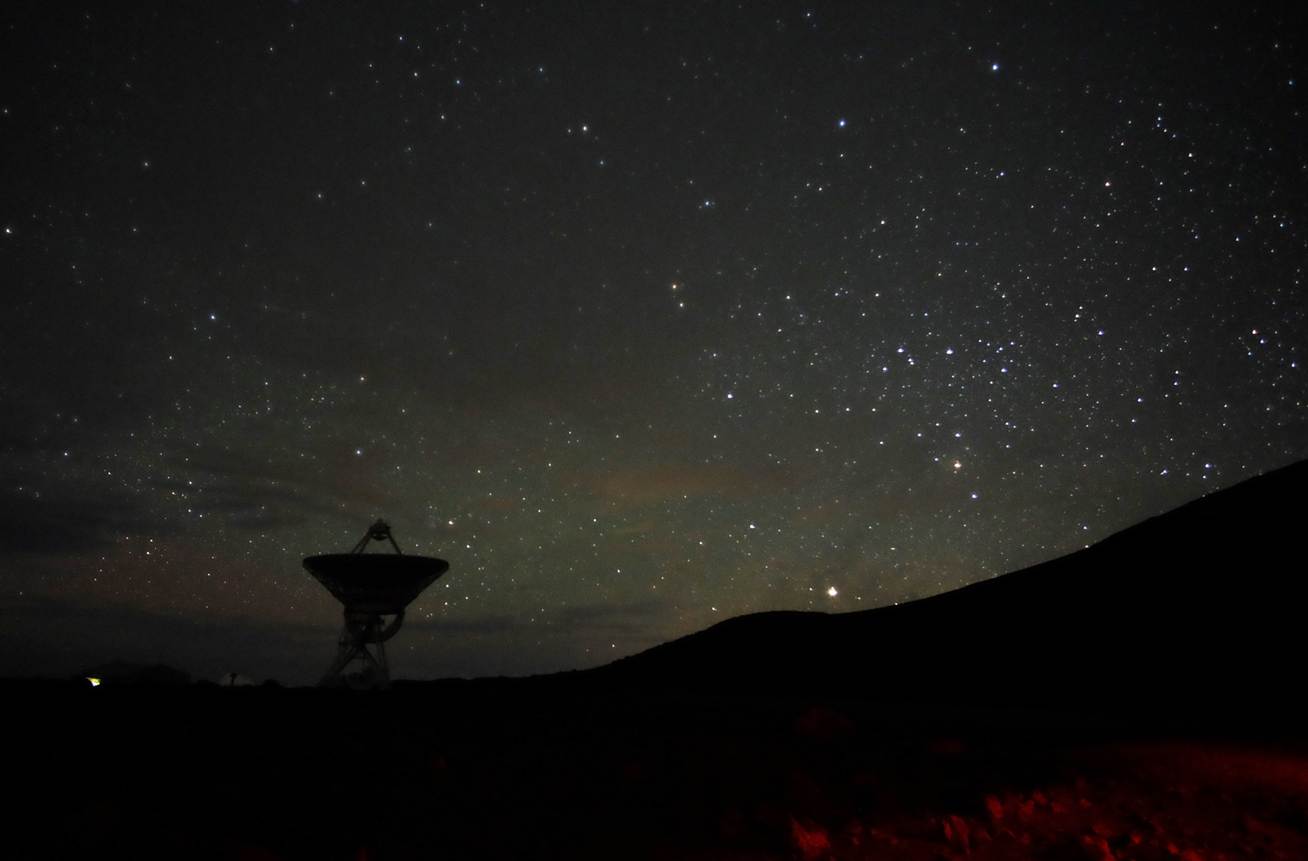
VLBA dish on Mauna Kea –
Fuji X-M1 + Samyang 12mm F2, 20s F2 ISO 3200.