Urban
Astronomy
Imaging through Light-Polluted Skies
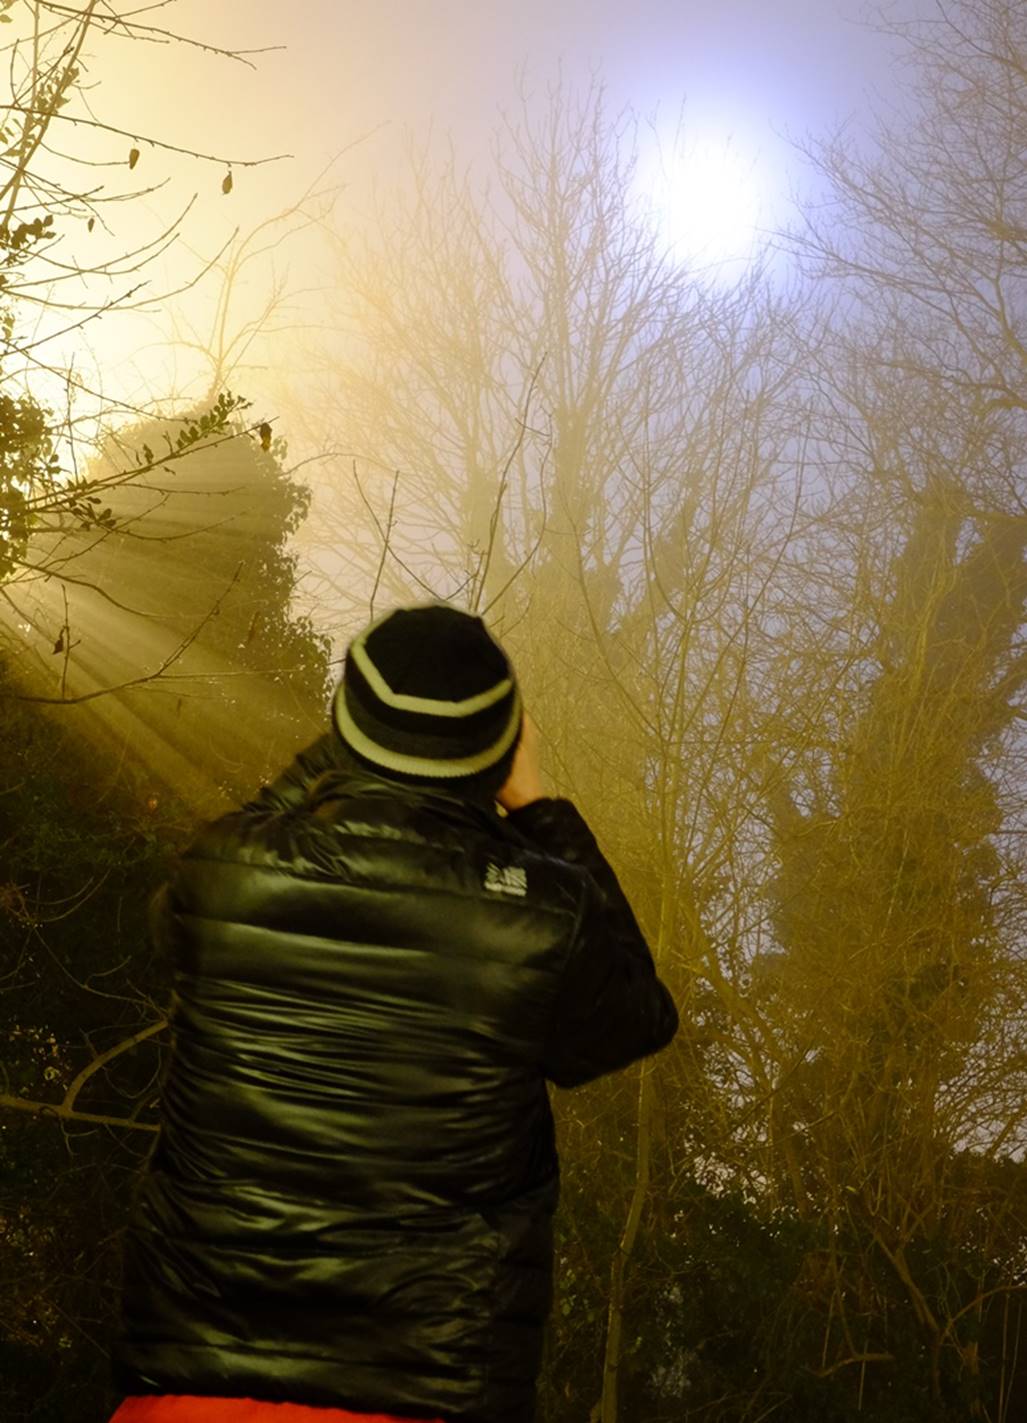
Viewing
the Moon through trees at Midnight from a communal urban back garden.
Introduction
If
you live in an urban area, perhaps with only communal gardens, a balcony or
nowhere at all to setup a scope, reading my prattles about observatories and
grab-n-go scopes probably seems irrelevant, even irritating.
I
live in the country now and have the space for an observatory, but I grew up in
the London suburbs and have spent many years living in towns and cities. Urban
astronomy is a problem I’m familiar with. So I decided
to collect a few ideas and tips on how to be an urban astronomer and set them
out here. I have reviewed most of the gear mentioned elsewhere on this site.
Choosing
a Scope System
Even
if you do have somewhere you can set
up in an urban area, the scope is going to have to be a portable one; how
portable will depend on where you view and how you get there! Al Nagler of Tele Vue famously used to do astronomy with a big
Dobsonian from a New York sidewalk, but I think you
would struggle to get away with that in most urban areas of the UK.
Tip: the further you have to travel on foot
and the more insecure the viewing site you choose, the more portable your rig
will need to be.
Small
refractors in the 2”-4” aperture range on simple alt-az
mounts (like the TV-60 rig described below) can work well for the peripatetic
urban astronomer. So too can the most compact Maksutovs
and Schmidt Cassegrains in the 3”-5” range, which
also typically pack down into a small case plus a tripod of some sort. Dobsonians (even the smallest ones) are often a bit big
unless you live really close to where you’ll be setting up, or can easily drive
and park close to your viewing site.
Another
consideration is storage: a system that breaks down into small, easily stored
modules (preferably in cases) will be easier to keep in a cramped flat or bijou
terraced house. Some mounts in particular are much better in this respect than
others. Even my big AP1200 mount and pier break down into surprisingly compact
units for storage; they’re quick to assemble too. AP has put a lot of effort
into designing its mounts that way, but even the smallest (the Mach 1) would
need transport by car.
Some
ideas for highly-portable telescope systems – ones you could travel with on
foot or by public transport - follow.
Example
Portable Telescopes
Questar
3.5
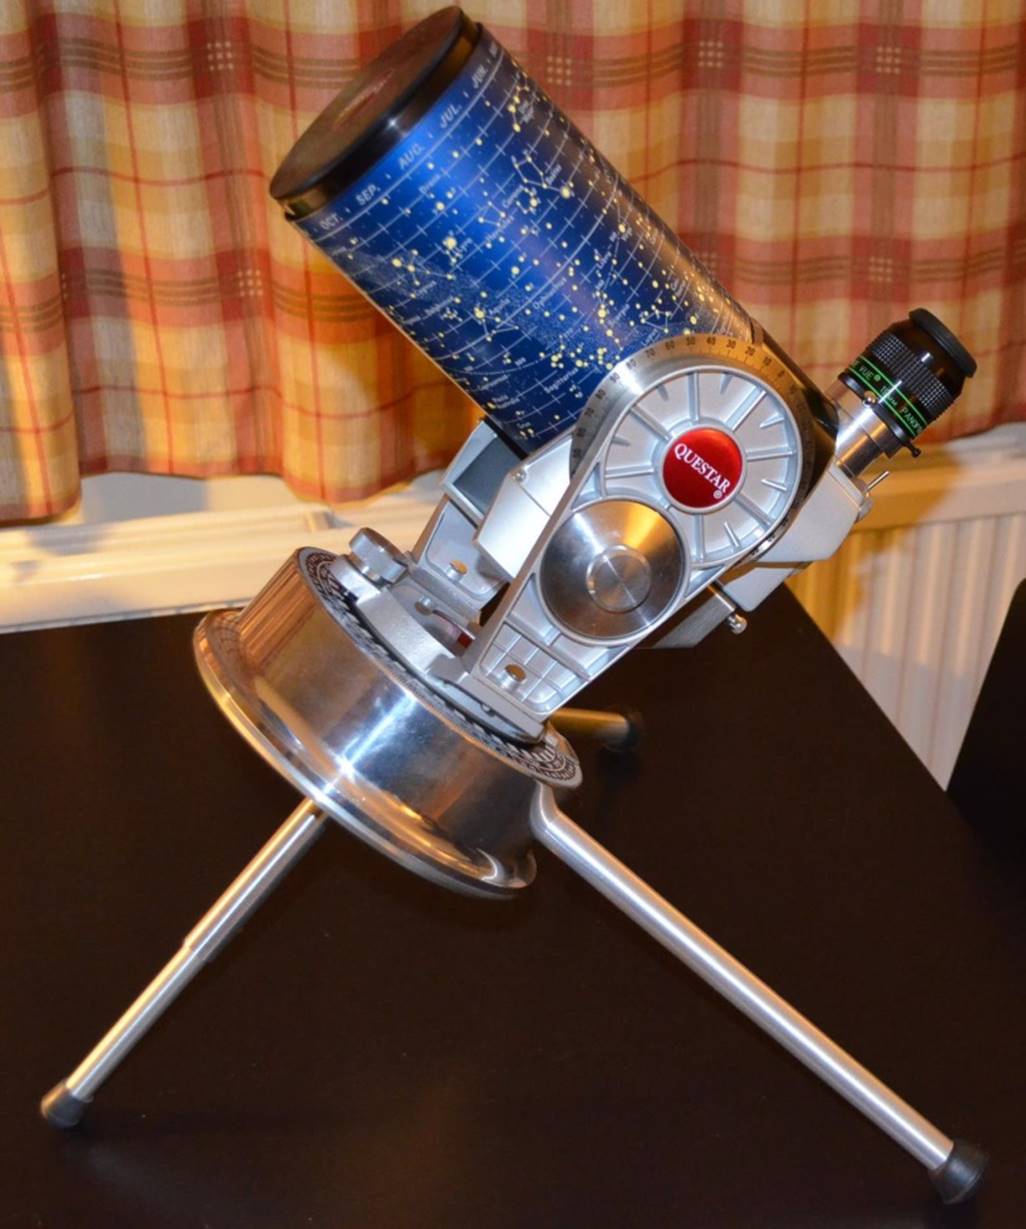
Questar
3.5 in table-top mode.
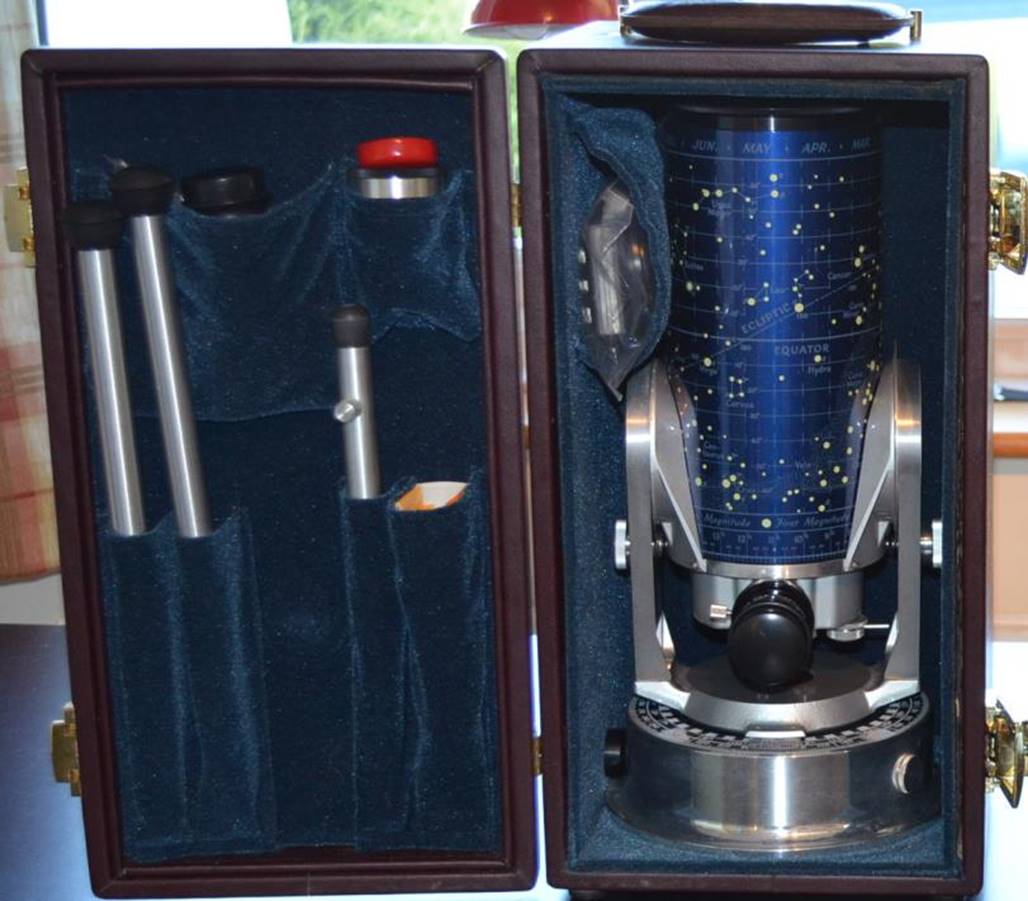
Questar:
everything fits in one small case.
Tip: If money were no object and I was stuck
in an urban environment with no garden, but where there were nearby public
spaces to set-up, I would go for a Questar: it is just so easy to carry and
quick to set-up.
The
Questar 3.5 is still the ultimate small travel scope in my opinion, because the
whole thing is integrated into one unit. A case that’s about 40cmx20cmx20cm
contains the whole system which comes with integrated finder, eyepiece,
diagonal, barlow, solar filter, tracking mount and
Moon and star maps.
There
are lots of options to consider with a Questar and it’s far from cheap, but not
bad value in my view considering what you get. People dismiss the Questar as
poor value compared to say a big Dob’, but that’s missing the point – for
ultimate portability and convenience nothing else comes close.
You
can literally just take a Questar out of its case, put it on a flat surface (a
bench, picnic table, car bonnet etc) and observe in alt-azimuth mode with no
messing. I use a small square of leatherette material to stop it scratching the
car.
The
Questar comes with table-top legs to use it as a table-top equatorial. You just
take them out of the case, slot them into the ports on the mount base and
adjust to your latitude.
If
you want to tripod mount a Questar, then things get more problematic. The
standard Questar pier and wedge is a superb bit of kit, but it’s much too heavy
to be really portable.
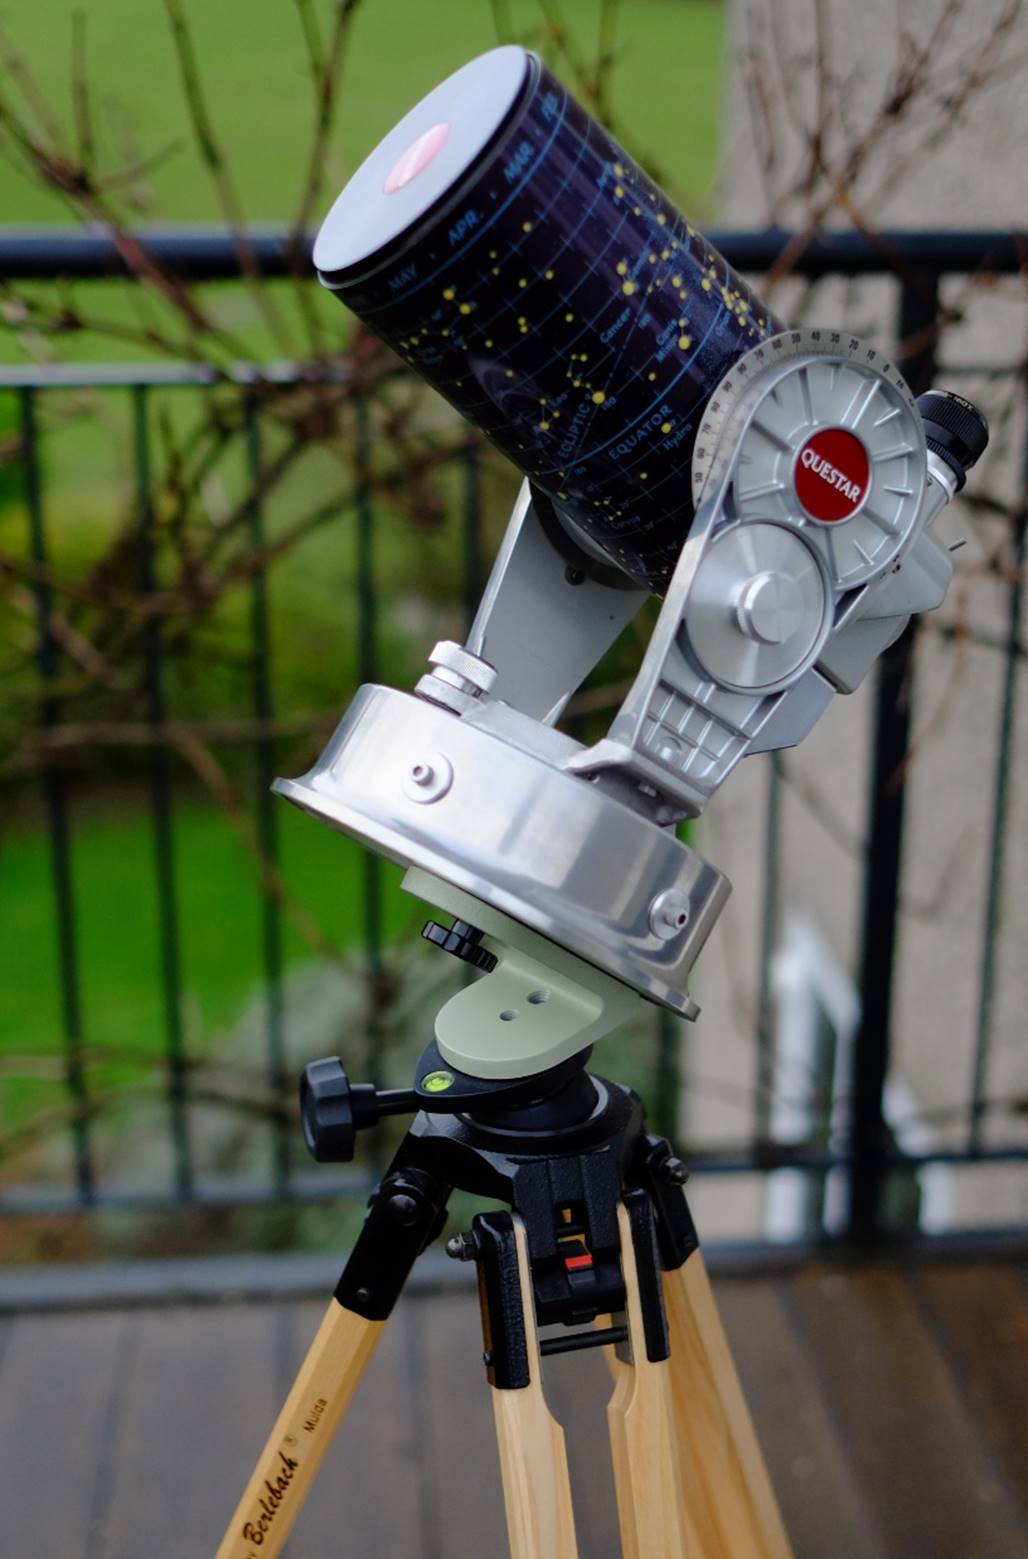
Questar
on a light-weight mount comprising a Takahashi wedge and Berlebach
tripod with ball-head.
Tip: A Questar has a ¼-20 thread in the base
so you can create an alternative light-weight tripod mount for a Questar from a
combination of a photo tripod and head.
A
stable and portable combination that I use is based on the tripod and adapter
for the Takahashi Teegul mount (see FS-60Q photo
below):
·
Berlebach 132 report tripod with integrated levelling
ball.
·
Takahashi
V-adapter for Teegul mount, Takahashi part no.
TSV60100
The
Takahashi V-adapter is just a tiny permanent 45 degree
wedge with a ¼-20 screw on one plate that fits the central screw in the base of
the Questar and a 3/8 thread on the other that fits the tripod. The trick here
is in the levelling ball. Fit the V-adapter to the tripod, then just fine-tune
to your latitude with the levelling ball, using the Questar as a polar scope
(set Declination zero).
The
tripod packs up to just 62cm and weighs about 3 Kg with the V-adapter attached.
You can get a little carry case for it from Berlebach.
The optional tray stiffens it up and gives you somewhere to put stuff.
This
solution makes a really simple and highly portable mount for your Questar,
ready to go and observe as soon as you are!
TeleVue TV-60
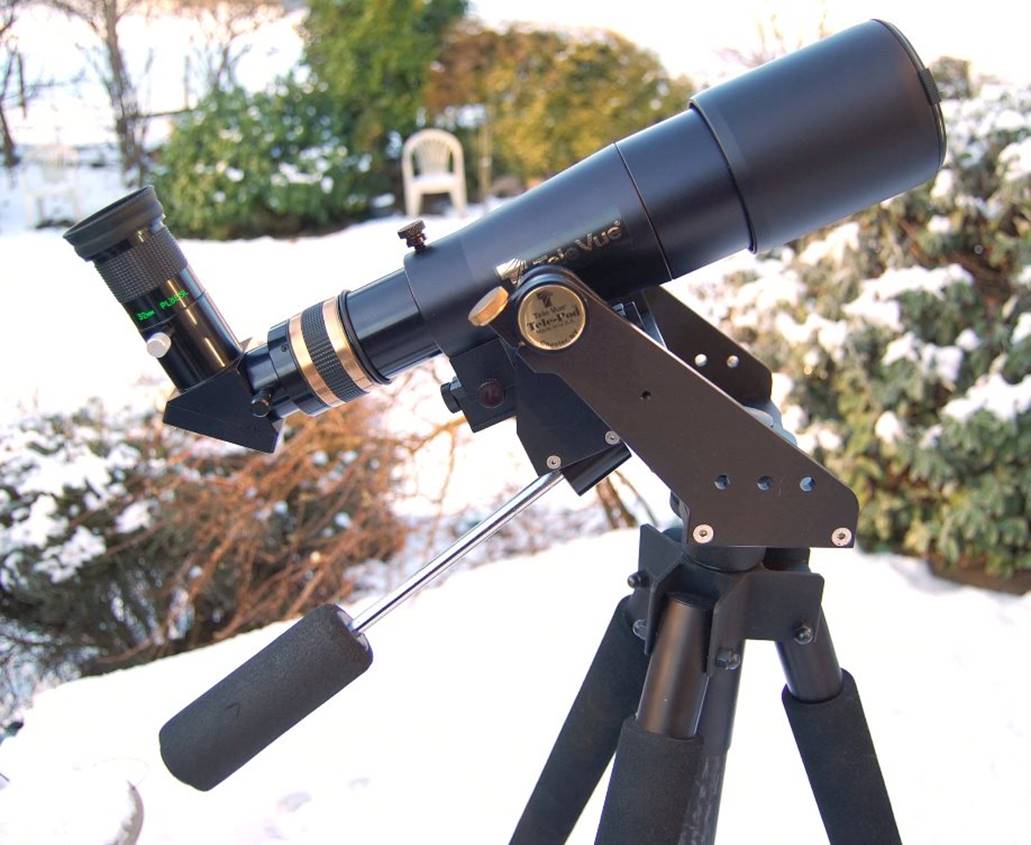
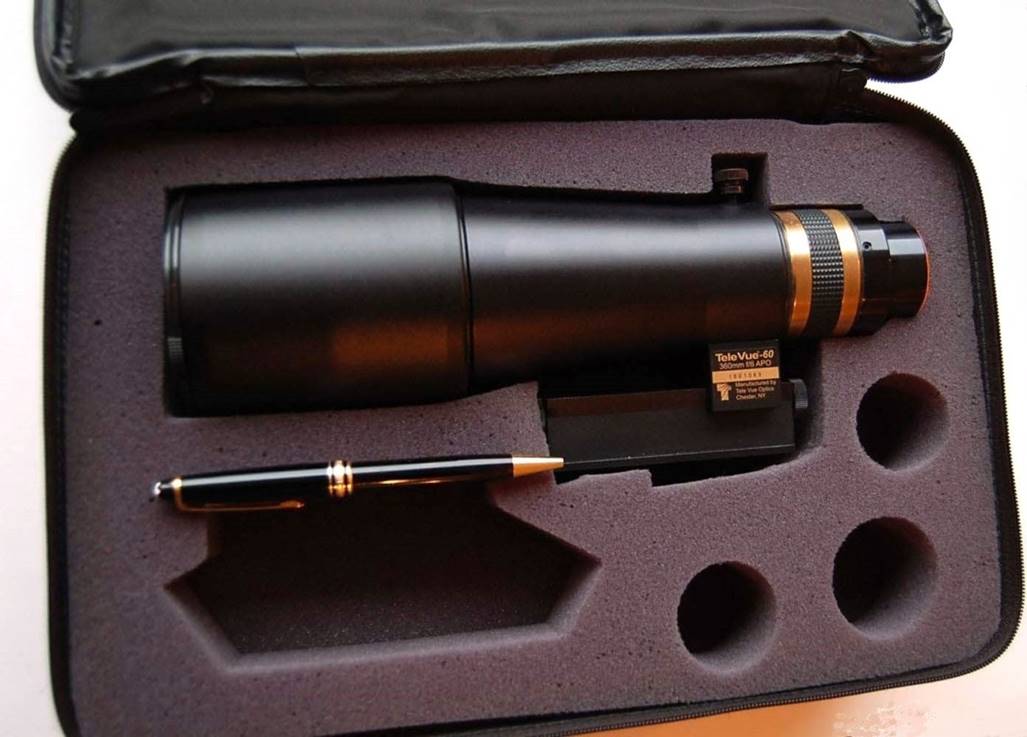
The
most portable small refractor system I know of is TeleVue’s
tiny TV-60 apochromat mounted on their TelePod alt-azimuth
mount. Equipped with one wide-field eyepiece (say a 13mm Nagler
T6 or 16mm T5) and a 3-6mm Nagler Zoom, which pack in
the standard carry-case, it makes a powerful portable telescope system. But
because of its short focal length, you really do need fancy eyepieces like that
Nagler Zoom to achieve the kind of higher powers it’s
capable of.
It’s
also worth noting that setting the TV-60 up to observe will involve more
fiddling with diagonal, eyepieces etc than the Questar.
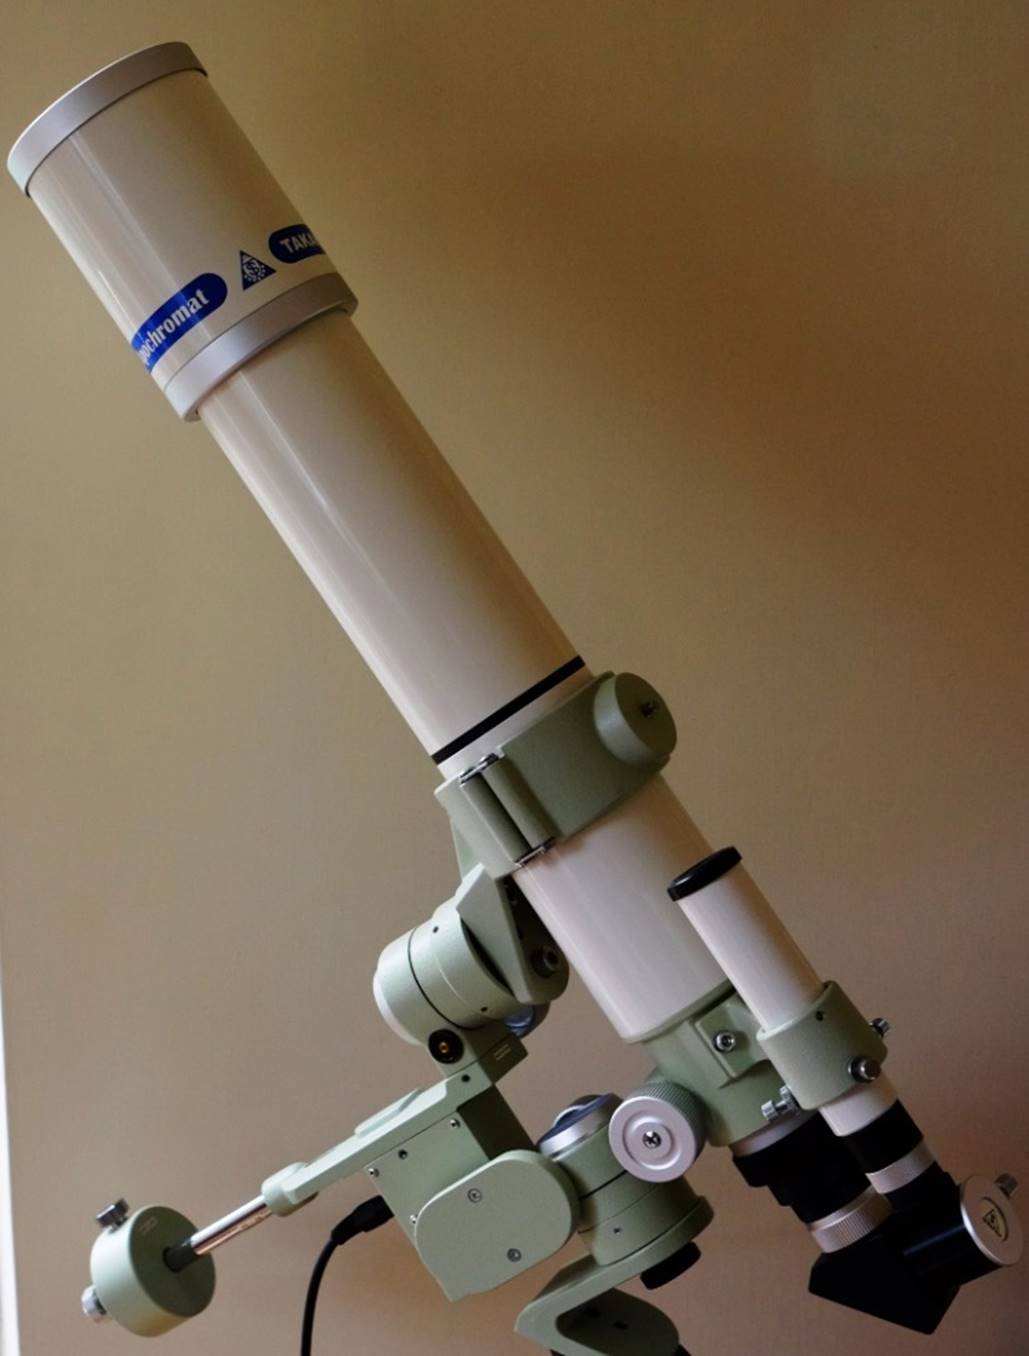
Takahashi
FS-60Q

If
you prefer refractors, but want an equatorially mounted (i.e. tracking) system,
Takahashi’s FS-60Q modular refractor on their little Teegul
mount is about the smallest and most portable system I know. The whole German
equatorial mount comes apart into tiny, easy-pack modules, as does the scope
itself.
In
operation, the Teegul is very stable, easy to use and
tracks nicely. Meanwhile, the FS-60Q arguably gives a better view than a
Questar and is certainly much more flexible because you can easily convert it
into a wide-field mini-astrograph by unscrewing the Q-module and inserting a
field-flattener.
BUT
… consider that in truth it’s still nowhere near as integrated, portable and
quick to set-up as a Questar.
Takahashi
FC-76
Split-tube
FC-76DC is carry-on portable, stable on Teegul mount.
Mounted
on the Teegul, the FC-76 is a step-up in visual
performance from the FS-60Q, though you’d need a flattener for serious astro-photography with the FC-76 (but not for the 60Q at
its native F10, anyhow).
In
either the split-tube FC-76DC version (shown above) or the sliding dewshield FC-76DS it is super-portable, balances very
stably on the Teegul with the standard tiny
counterweight and is a great little general purpose ‘scope that gives good
views of everything, including the Moon and Planets (on which the 60Q is
limited by its aperture).
Telescopes
for Airline Travel
The
telescopes described above are all easily carry-on portable. By that I mean
that the telescope will fit in a cabin bag whose maximum dimension is usually
~22”. But so far we’ve been talking small apertures.
What about a larger travel scope for deep-sky imaging abroad or perhaps
high-resolution views of a planetary opposition (2018 was the closest Mars will
get for a long while, but in Northern Europe it was barely over the horizon at
opposition).
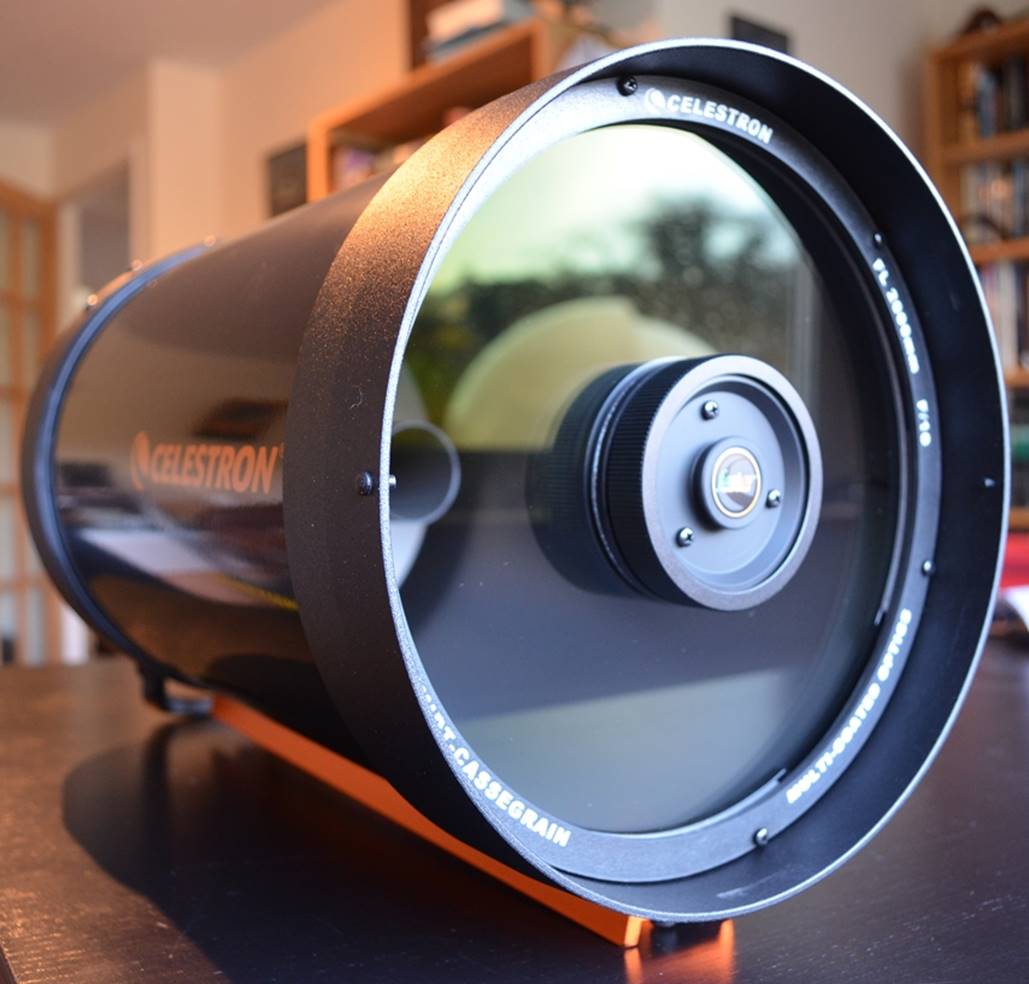
Celestron’s C8 is one of the largest aperture scopes
you’ll get in a carry-on bag: surprisingly compact and light too.
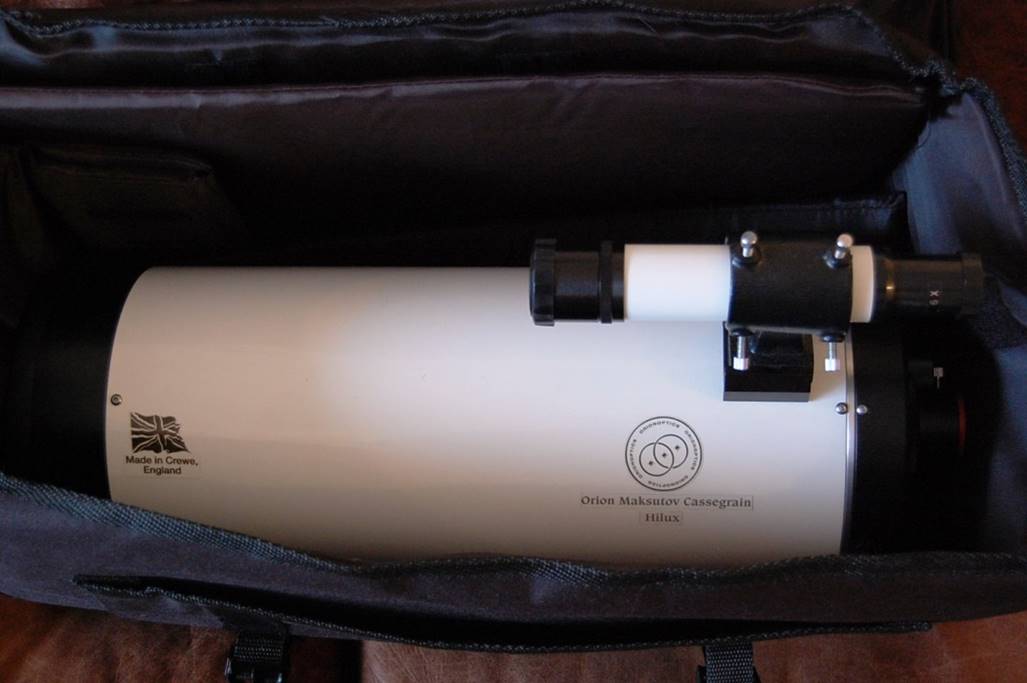
Orion
Optics OMC 140 Maksutov nestling in its carry-on
travel bag.
Many
refractors up to three inches aperture and Schmidt-Cassegrains
and Maksutovs up to four-five inches aperture will
fit in a carry-on bag. Above that, it gets much trickier. The following larger
telescopes may or may not fit in a cabin bag, depending on the airline:
·
Astro Physics
Traveller 105mm
·
Astro Physics
Starfire GT 130mm
·
TEC Eclipse FL
110mm
·
Takahashi FC-100DC/DZ
(with focuser and dew shield removed)
·
Takahashi Sky-90
·
Takahashi TSA-102
(sliding dew-shield version with 3” Feathertouch
focuser only see note below)
·
Various Borgs up
to 125mm
·
Some variants of
the LOMO 95/650
·
Some variants of
the LZOS 105/650
·
Some variants of
the LZOS 123/740
·
Some variants of
Chinese 90mm F6 triplet (TS and Stellarvue, for example)
·
TeleVue TV-85
·
Celestron C6 and C8
·
Sky-watcher 150mm
and 180mm Maksutovs
·
Orion Optics
140mm Maksutov
Tip: refractors that use the 3” Feathertouch focuser can be reduced in length by about 93mm
for travel with no risky threads to deal with: loosen the rotator thumb screws
and remove the focuser from the collar. Then replace it with a Starlight
Instruments dust cap. This will make all the difference in some cases.
Mounts
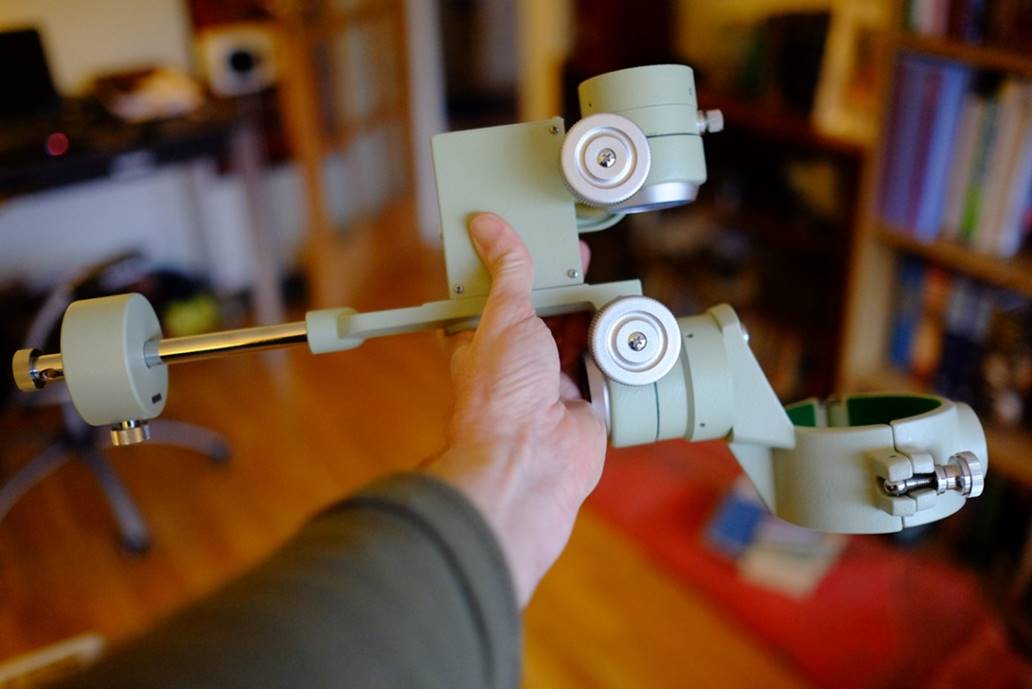
Takahashi
Teegul SP2 complete with weight and tube-ring.
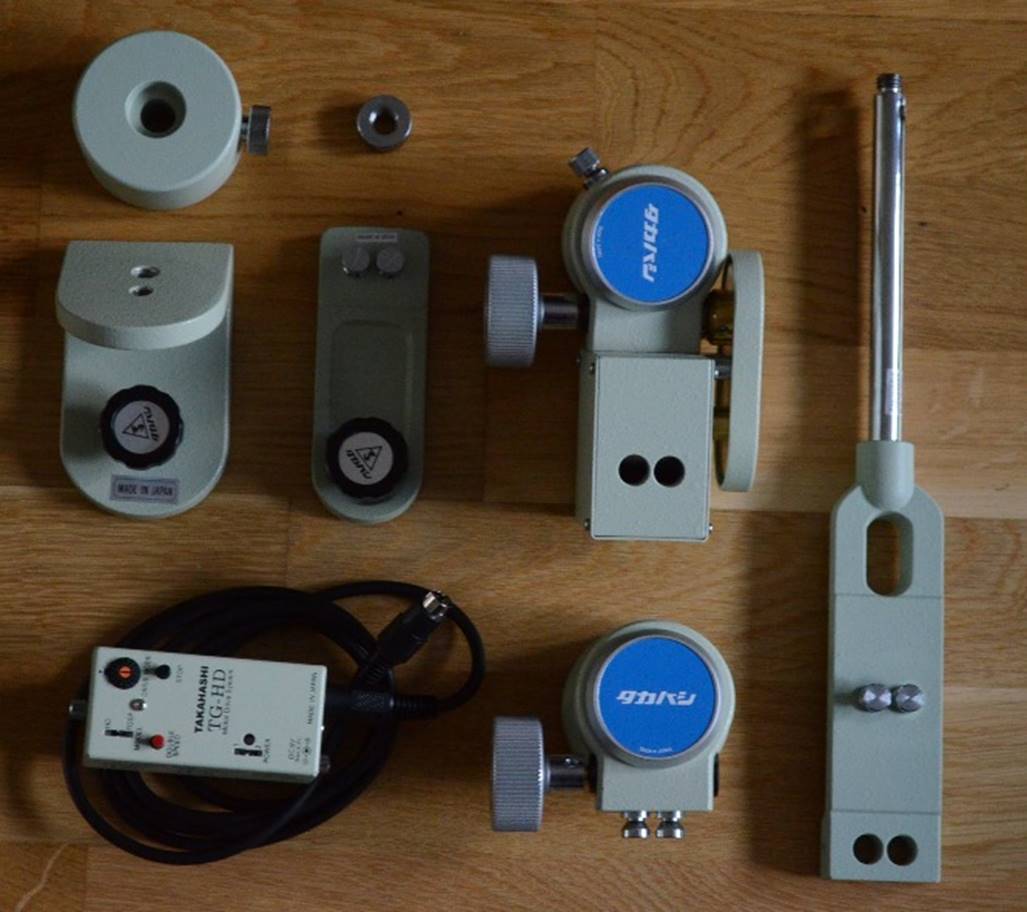
Teegul
breaks down into tiny components.
For
really small telescopes you may be able to use a larger photo tripod and geared
or panning head. The TeleVue Telepod
mount show above is ideal for small refractors like TeleVue’s
own. Other small alt-az mounts are widely available,
such as Vixen’s Mini-Porta. Borg make a small alt-az
with slow motion controls that looks good too and even Sky-Watcher’s basic Altaz mount is very light-weight.
Tracking
mounts are generally less portable and more fiddly to
set up, with their electrics and counter-weights. The Takahashi Teegul already discussed is ultra-portable and needs no
external power supply (batteries are in the tiny handset shown), but only takes
scopes up to ~3Kg in weight. Other small tracking mounts are available for
small refractors and SCTs/Maks.
However,
many larger scopes will need a much larger mount. Some heavy
duty counterbalanced alt-az mounts, such as
Sky-Watcher’s SkyTee2 may carry many of the scopes listed and are quite
portable. Alternatively, a massive conventional alt-az
mount such as KK’s T-Rex or the DiscMount DM4/6 may
be viable too, but would be much heavier to drag around.
If
you want a highly portable tracking mount, then Vixen’s SX2 mount looks good –
all enclosed and quick to set up, it is very light weight for its capacity (7kg
weight/12Kg capacity) and the standard HAL130 tripod is light too. The SX2
cleverly uses the motors as a counterbalance so that much smaller
counterweights are required, thus reducing travel weight considerably. It
should be much easier to travel with than most mounts in its capacity range.
Transport
Cases
You’ll
be needing a sturdy case for your telescope and mount if you’re traveling with
it, even locally in the car or on public transport.
Many
telescopes come thoughtfully provided with cases. If not, then hard-shell
camera cases with pluck-foam may be adaptable to smaller OTAs. Custom scope
case makers like Scope Guard are also worth considering and people have
commissioned similar cases from manufacturers that specialise in the kind of
hard cases musicians use for their gear.
Trouble
is, many standard cases are not carry-on size, even if the telescopes
themselves are. Firms like Peli’ have designed cases
that maximise the carry-on allowance aimed at peripatetic photographers and
these may be adaptable. Unfortunately, many of those larger telescopes listed
will only just fit under the carry-on limit and a thick-walled hard case may
not allow enough internal space for them. If all else fails, you could try
sowing a simple barrel-case from leatherette lined with foam and felt and
closed with a zip.
You
can get travel cases designed specifically for some mounts (such as
Sky-Watcher’s EQ5 and the Vixen SX2) and for tripods too (Berlebach
make cases specifically for most models).
Binoculars
Image
Stabilising Binoculars
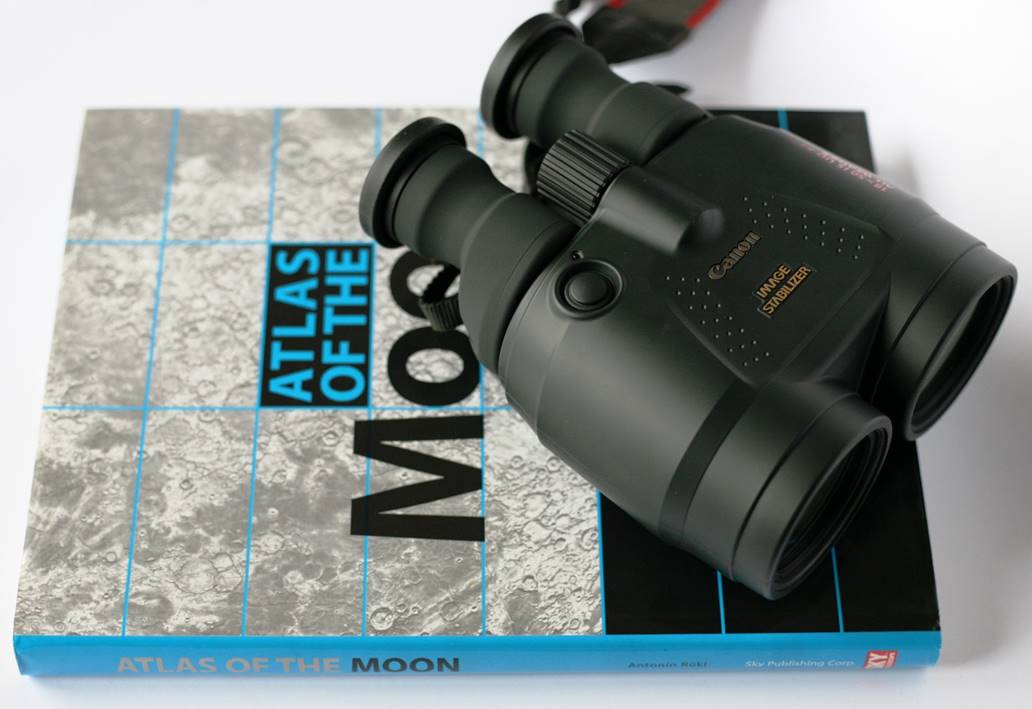
Image
stabilising binoculars take the shakes out of the view, allowing higher powers
than you could comfortably hand hold. Higher-power models give similar views to
a small telescope. Various companies make them, but those from Canon – ranging
from 8x25 to 18x50 (above) - are most common. Zeiss make the largest (and most
expensive) that I am aware of – a 20x60 that employ a purely mechanical
stabilising system.
If
you have to view from a park bench or some public space like a car park or
street where you can’t set up a telescope, image stabilising binos may be your best bet.
A
pair of Canon 18x50s are compact and easy to take to
any local spot with an open sky, yet they can give surprisingly involving
views: the major Lunar features, Jupiter’s Galilean moons, Venus’ phases and
lots of easy double stars like Albireo.
If
you can’t afford one of the larger pairs (like those 18x50s), don’t despair.
The basic Canon 10x30s and 12x36s are still excellent binoculars that will show
you a lot and they can be had for a few hundred quid. I spent many happy hours
amidst the vineyard terraces above the Swiss lakeside town of Vevey, lying on
my back on a wall and scanning the sky (or finding the lights of distant
chalets high in the snowy mountains around) with a pair of Canon
10x30s.
Other
High-Power Binoculars
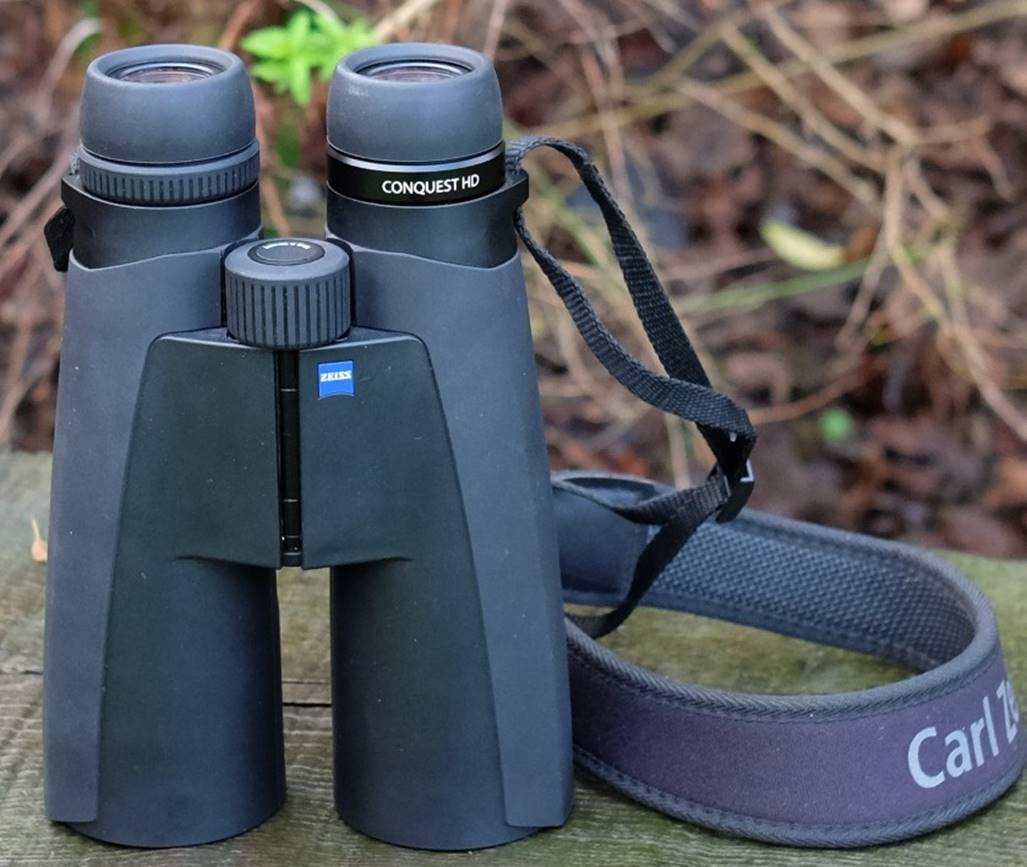
Zeiss
15x56 Conquest binoculars: astronomy from a park bench.
If
you are put off by the fact that image-stabilisers are essentially an expensive
piece of consumer electronics, then ordinary high-power binoculars can work well
in an urban environment.
Why
high power? Because higher powers (i.e. 10x and above) cut through sky-glow
better than low powers. So you should be able to find
brighter deep sky objects as well as exploring the main features of the Moon.
They should also allow you to track Jupiter’s Galilean Moons and spot Saturn’s
rings and Titan, perhaps even glimpse Venus’ phase and split easy double stars
like Albireo as well.
You’ll
find 1950s astronomy books recommending 7x50s, but that was from a time when
streetlights were about as bright as a candle in a jamjar.
These days, 7x is just too low-powered to cut through light polluted urban
skies.
So
which pair of high-power binoculars to choose? Several good 15x56 models are
available, designed for the hunting market but excellent for astronomy too.
Zeiss’ 15x56 Conquest HDs are a good buy, whilst Swarovski’s 15x56 SLC HDs are
the very best, but more expensive. On a tighter budget, I can recommend Nikon’s
16x56 Monarch 5s. If you want the very highest power in a premium binocular, it’s
got to be Vortex’s Razor 18x56s.
All
high-power binoculars can be tripod mounted for greater stability, but an
alternative is just to lean on something for greater support, whether it be a
tree trunk, a wall or the roof of a car (preferably your own!)
Tip: holding the binoculars around their
objectives is a good way to reduce the magnified shakes you get with higher
powers.
If
you want a quality pair of binoculars that can also be used for birding, then
10x42 and 10x50 models can be a good choice. Even a good pair of 8x32s or
10x32s is surprisingly usable for astronomy.
If
you get the chance, then jumping in the car or on a train or bus to the
countryside could deliver an evening of looking for all those faint DSOs you
can’t spot from your (sub)urban home. All you need is your bino’s,
a good astronomy app for your phone to help locate things, and a really warm
jacket.
Tip: I find duvet jackets ideal for observing
because they are typically light to wear and unconstricting (important if
you’re spending lots of time holding up binoculars) but very warm.
Finding
Somewhere to View
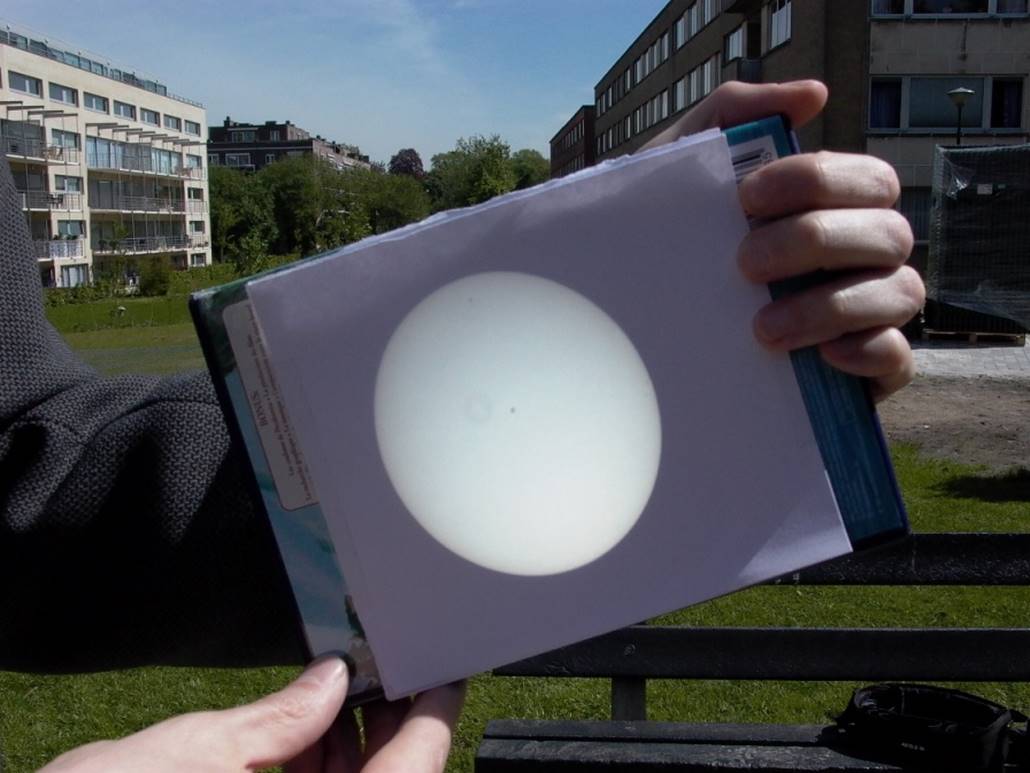
Projecting
the Sun with a small Maksutov in an urban park near
Brussels.
Another
urban environment in which I spent a few years was Evere,
a suburb of Brussels. We had a flat with a large balcony (big enough to call a
terrace), but it was towards the bottom of the block of flats, on a street with
another block opposite. The sky view was seriously restricted. It was like
doing astronomy through a letter box. Inevitably I used to have to go elsewhere
to do astronomy and I used to frequent a small park nearby. Nobody seemed to
mind me skulking with my scope on a grassy patch behind the swings, but I might
not want to try the same thing in London.
There’s
safety in numbers and some astronomical societies have regular meetings in an
urban park. A good example is London’s Baker Street Irregular Astronomers.
Named after the street urchins Holmes employed to do his dirty work, the BSIA
meet regularly in nearby Regent’s Park. It’s a convenient location for both
urban and suburban astronomers - close to London’s Euston, King’s Cross and St
Pancras mainline stations and with decent parking (it’s outside the congestion
zone).
If
all else fails, you could drive somewhere fairly secluded and use a car window
mount with a small scope (these are like a tripod head, but attach to a
half-lowered window). In similar vein, Questar’s 3.5” models ingeniously
include lugs you can screw-in to the base to hang the Questar off a car window,
but it looks precarious!
Urban Stealth

Whilst
living in the centre of a Swiss town, I used to set-up on the lakeside
promenade in a dark corner right by the lapping waves and hope no one bothered
me. One thing that really helped me keep a low profile was Tele Vue’s TV-60
(see above). Not only was the TV-60 small and easy to carry; its satin black
finish made it really stealthy on its all-black Tele Pod tripod and mount. I’m
sure I got a lot less hassle from the late-night drunks buying pizza across the
way than I would have done with a more traditional white scope.
Today,
many scopes are available in stealthy black (sometimes as an option) – worth
considering for urban astronomy, even if (like me) you find white more
aesthetically pleasing.
Star Parties
No
garden? No balcony? Nowhere nearby you can safely set up a scope and observe?
You’re not alone. If that’s the case, star parties make a great way to meet
other astronomers (and use their expensive gear!) in safety. Old observatories
in cities and towns often have open evenings and star parties where urban
astronomers can rig-up larger scope systems amongst like-minded souls. Again,
think carefully about a setup that’s easy to break down and store away and easy
to transport. Alternatively, the observatory may well open its own telescopes
up for public viewing. Such events are great fun and can give a real sense of
what it was like when professional astronomers worked visually with big
telescopes.
Park-bench Astronomy
If
most of your astronomy does get done at star parties (or not at all) and you
still want a regular astro-fix, you’ll have to be
creative, especially if there’s nowhere you can set up a telescope. I tried
various ways to grab quick-look views of the Moon, planets and brightest
clusters when living in town; like me you may end up viewing from some
convenient bench.
I
tried a 10x25 monocular from a park bench, but it was too low-powered, didn’t
collect enough light and was too jiggly. I found larger hand-held telescopes
too unwieldy (and let’s face it, they look ridiculous and distinctly pervy used
in town).
Tip: this is where, in my opinion,
image-stabilising binoculars really come into their own.
Astronomy out of the Window?
I
recall a friend once telling me proudly how he’d designed big skylights into
his new loft conversion specifically so he could do astronomy in comfort. I hadn’t
the heart to tell him. You see, trying to
do astronomy through a window, open or closed, generally doesn’t work very well.
Open the window and the flood of turbulent hot air destroys the image like
terrible seeing does. But try viewing through a closed window and the poor
optical quality of window glass soon becomes apparent. That at least is the
conventional wisdom. Is it true? Well, not quite.
In
fact, modern float glass windows are much better optically than older plate
glass. No they’re not 1/10th wave to match
your premium refractor or custom Dobsonian. No, you
can’t get away with anything like high powers through them. Yes, you get a
ghost image from the second layer of glazing.
But … try looking at the Moon through your
double glazing at 15-20x and you’ll likely be rewarded with a very decent view. I recently enjoyed the tail-end of a Lunar
eclipse with binos that way – snuggled into my
favourite armchair, rather than shivering outside.
If
you’re an urbanite with no easy access to the night sky from outside, then
viewing through a window with binoculars may actually be a way of enjoying
astronomy when otherwise you couldn’t.
Tip: experiment with different parts of the
window to find a good spot, because the glass flatness does vary a lot from
place to place. Obviously kill the lights to prevent reflections.
Might
it even be possible to have a specially ground and coated small optical window
pane installed? No idea, but might be worth investigating. Certainly, you could
get a small window company to make you a pane of single glazing to prevent
those secondary reflections and getting it coated shouldn’t be a problem,
either.
Similarly,
viewing through an open skylight might just work acceptably if you let the room
cool right down to ambient temperatures first.
What to View
Apart from where to set up, the two biggest
problems encountered by urban astronomers are restricted views and light
pollution. The first problem may be fixable by shifting around to find a gap
between buildings or trees, but the second really is not. But don’t despair!
The rapid roll-out of LED streetlights already seems to be making suburban
skies a bit darker and I have high hopes for the future.
In practice, current levels of urban light pollution means
deep sky viewing is restricted to a few objects – the brightest nebulae and
clusters. And in truth, even these don’t look much when overwhelmed by
sky-glow. In fact, I really didn’t do much deep sky observing at all until I
moved to the country.
The good
news is that Solar System observing isn’t affected by light pollution at all. You can
enjoy exploring the mountains, craters and rilles of
the Moon from a sodium-bathed urban street just as easily as from a dark country
lane. Ditto the planets: Venus’ phases; the albedo markings, polar caps and
bright clouds of Mars; the rings, polar hood and belts of Saturn; Jupiter’s
cloud belts and storms, Great Red Spot and Galilean Moons.
The Moon in particular is a great target for
urban astronomers and a half-decent small telescope and an app or atlas will
give you years of fun observing and indeed sketching its numerous features,
some enigmatic and elusive even in the space probe era.
Imaging through Light-Polluted Skies
Imaging deep sky objects won’t work through
strong light pollution, but you might be able to get serviceable images of the
brighter DSOs with a sky-glow filter if the sodium glow isn’t too strong.
Tip: start
with something bright like the Orion Nebula and move to fainter DSOs to see
what’s possible with your skies.
Again, imaging Solar System objects is largely
unaffected by light pollution. Imaging the Moon is really easy – you just need
a basic DSLR or compact system camera with interchangeable lenses. Buy a T-mount
for your camera and a nose-piece that fits in the focuser (either 1.25” or 2”).
Then fit the camera to the scope, focus (probably using Live View to get it
right) and snap away. You won’t need a tracking mount for the Moon as exposures
will be short. You could try collecting as many lunar phases as you can (late
and early ones will be very challenging).
You can image the planets through polluted
skies too. The traditional way is with a webcam or specialist video camera and
then processing the images with frame-grabbing and stacking software. For this
you will ideally need a tracking mount and perhaps other hardware, such as a
good barlow lens.
If you wanted to try some more serious
astronomy, you could use a video camera to try to spot meteorite impacts in the
dark part of a crescent Moon, which show up as tiny flashes. It should also be
perfectly possible to derive exoplanet light curves through polluted skies (how
is beyond the scope of this article).
Travel
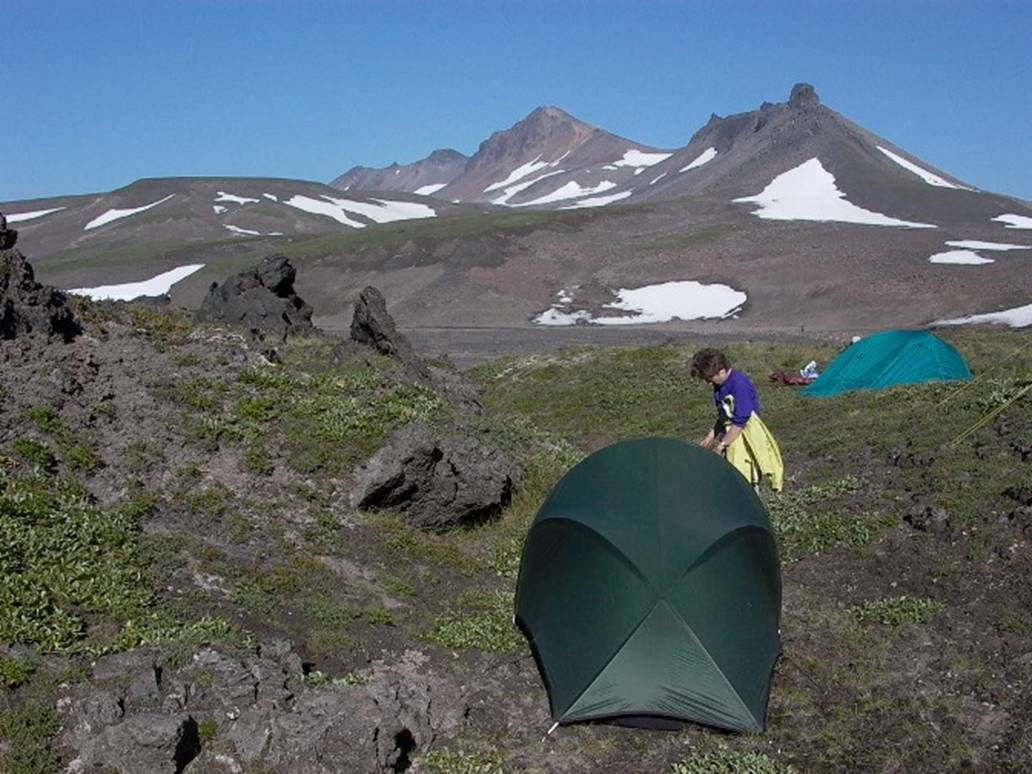
A
wilderness campsite offers perhaps the ultimate in dark skies.
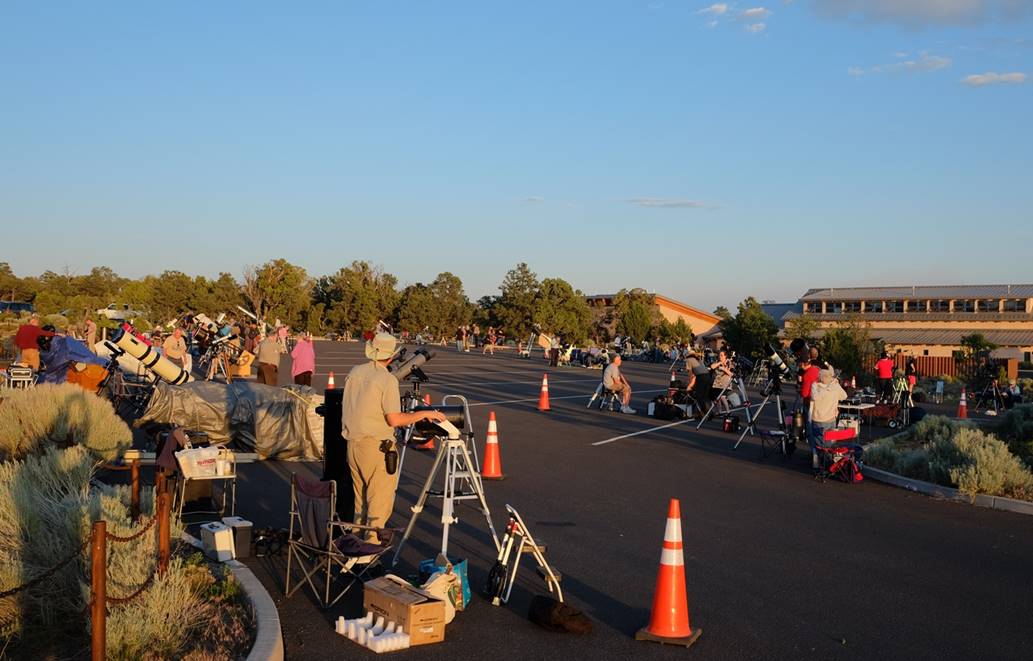
The
Grand Canyon Star Party is a yearly opportunity to view with other people’s
scopes under dark skies – for free!
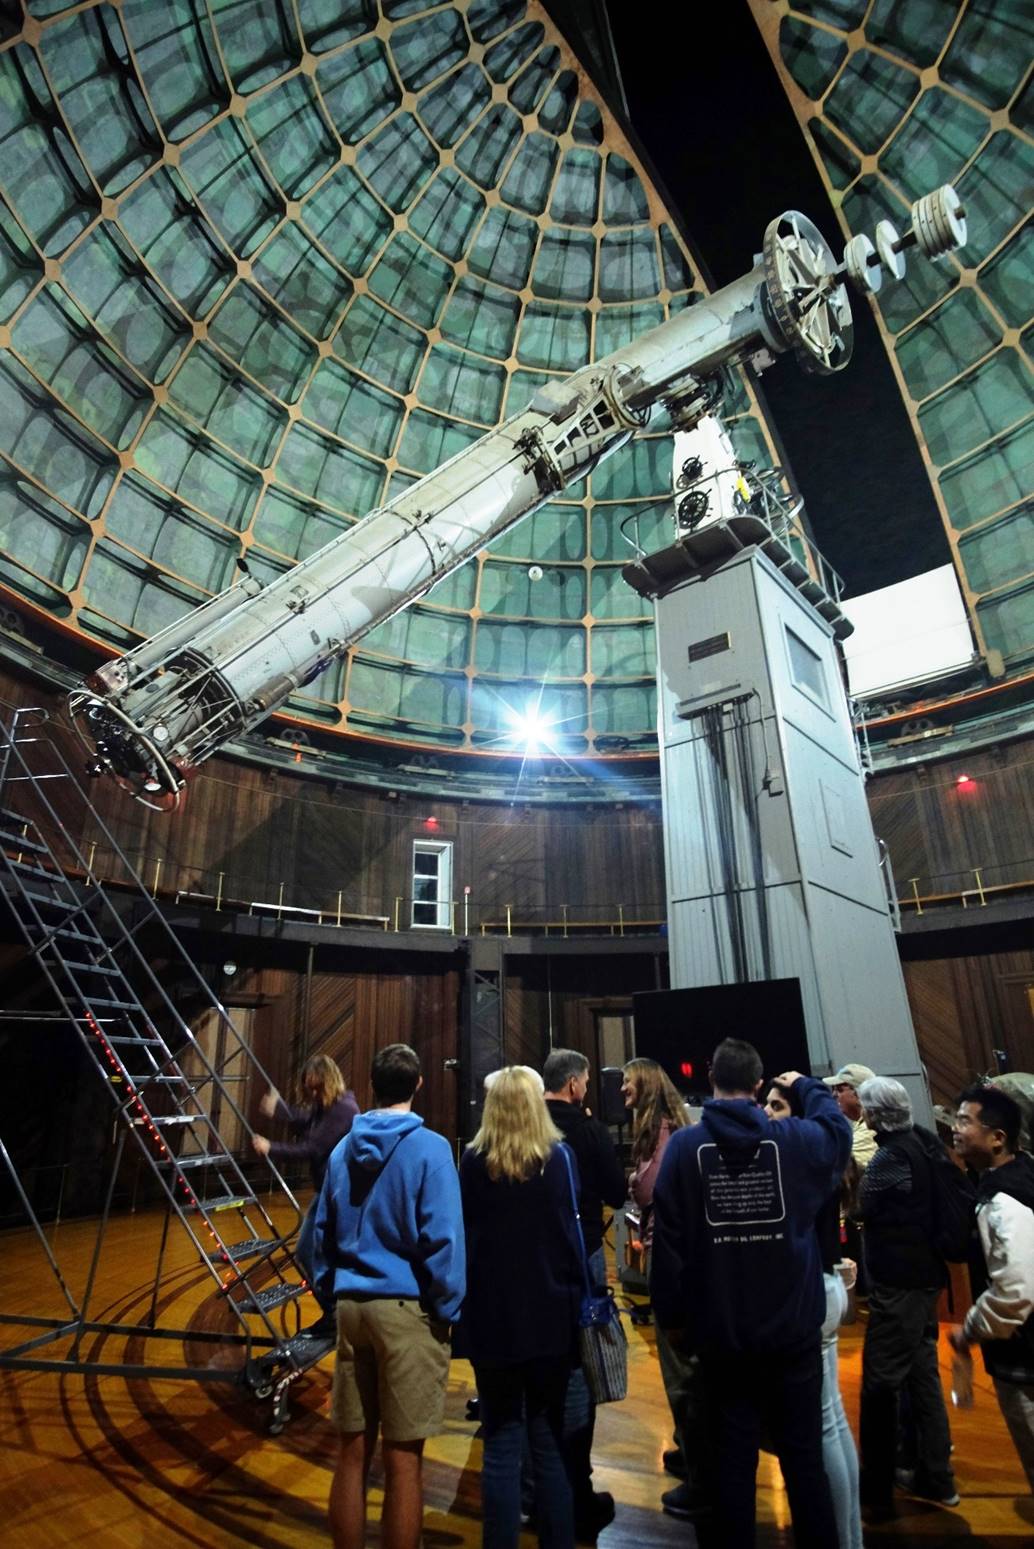
Some
of the world’s great observatories open their doors for public viewing
sessions. This is Lick in California.
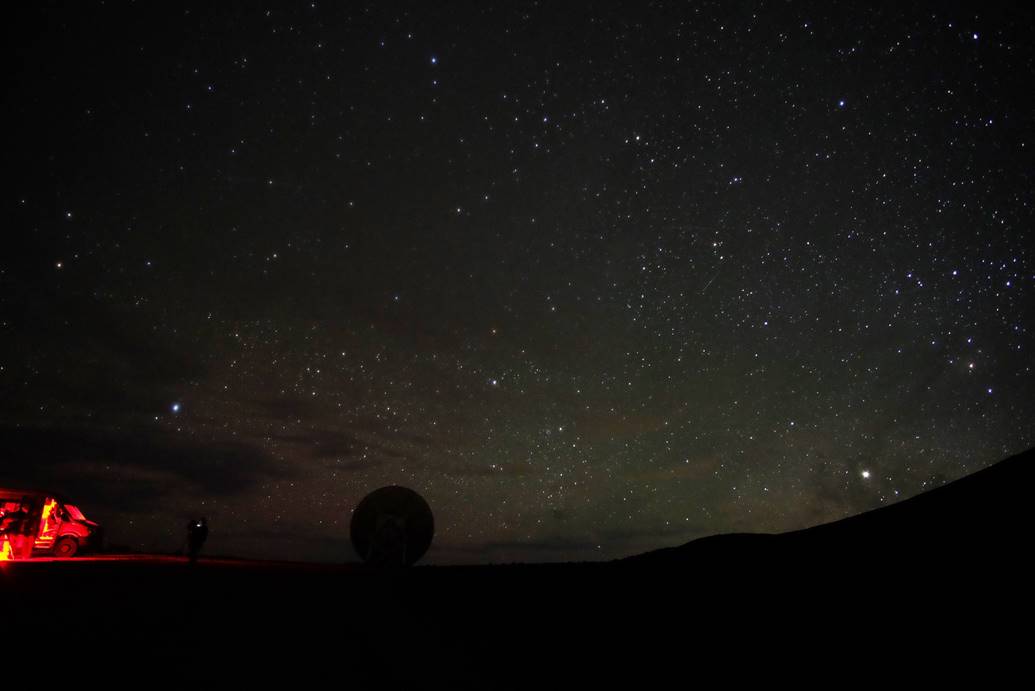
A
guided tour of Mauna Kea ends with a stunning observing session by a VLA dish.
If
you’re stuck in an urban environment with limited access to clear (or any!)
skies, then one way around it is to travel. Of course, you could travel to a
‘local’ dark sky site, but depending where you live that might be hundreds of
miles away. Alternatively, you could jump on a plane and go somewhere with
really good skies.
The
possibilities are almost endless. Many rural parts of continental Europe have
good skies, with a better chance of good weather and stable seeing in the
south. Quite a few astronomers favour the easily and cheaply (for Europeans)
accessible Canary islands, where (on La Palma) there
is a major professional observatory and various scenic viewpoints where
amateurs can set up and take advantage of the clear, un-polluted skies.
Further
afield, it almost goes without saying that the high and dry Atacama Desert in
Chile has some of the best skies on Earth and hosts many of the biggest
astronomy projects, like the VLT and ELT. Those professional observatories are
very remote, but the area of the Atacama around San Pedro is on the tourist
trail and quite accessible.
Much
more mainstream is the Desert Southwest of the USA. Many parts of New Mexico,
Arizona, Nevada and California have good skies away from the cities and long
runs of bad weather are mercifully rare. One of the easiest ways to observe
under a dark sky in the US is from the campsite or parking lot of a national
park and some national parks have organised star parties (the Grand Canyon’s is
a major event every June). Some of the big observatories have star parties too
and others have astronomy programs that run from nearby national parks (such as
Kitt Peak’s binocular astronomy program at Saguaro National Park).
Perhaps
the ultimate dark skies are to be encountered on a wilderness trek. Again the possibilities are endless, but I’ve personally
experienced stunningly dark and transparent skies whilst on camping treks in Iceland,
Kamchatka and Patagonia, experiences to remember forever.
Another
opportunity is to travel to the opposite hemisphere and encounter a world of
deep sky objects you’ve never seen before. For a northerner, a trip down under
in winter or spring will offer up the Magellanic
Clouds and the Eta-Carinae nebula (and others) around the Southern Cross. You
wouldn’t really even need a telescope, just a dark sky (shouldn’t be a problem
in Aussie) and good pair of 42mm plus binoculars (premium 32mm at a pinch, but
no smaller).
Travelling
for specific big astronomy events (mainly eclipses, but also transits and
planetary oppositions) is almost a separate pastime taken very seriously by
some. Numerous travel firms cater for eclipse tourism in particular.
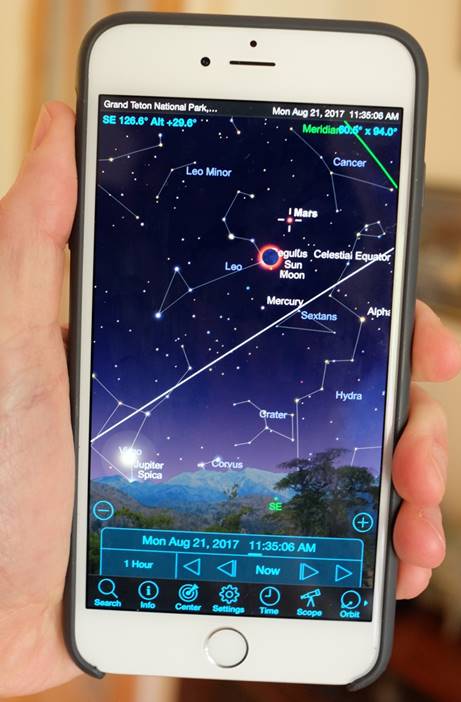
Tip: if
you do travel for a specific object or event, just make sure (using planetarium
software) that what you want to see is viewable at a convenient time and
altitude when/where you’re planning to go! I plugged the details of the 2017
USA solar eclipse into the software on my phone to see if was going to be
visible from a favourite spot. As you can see, it was!
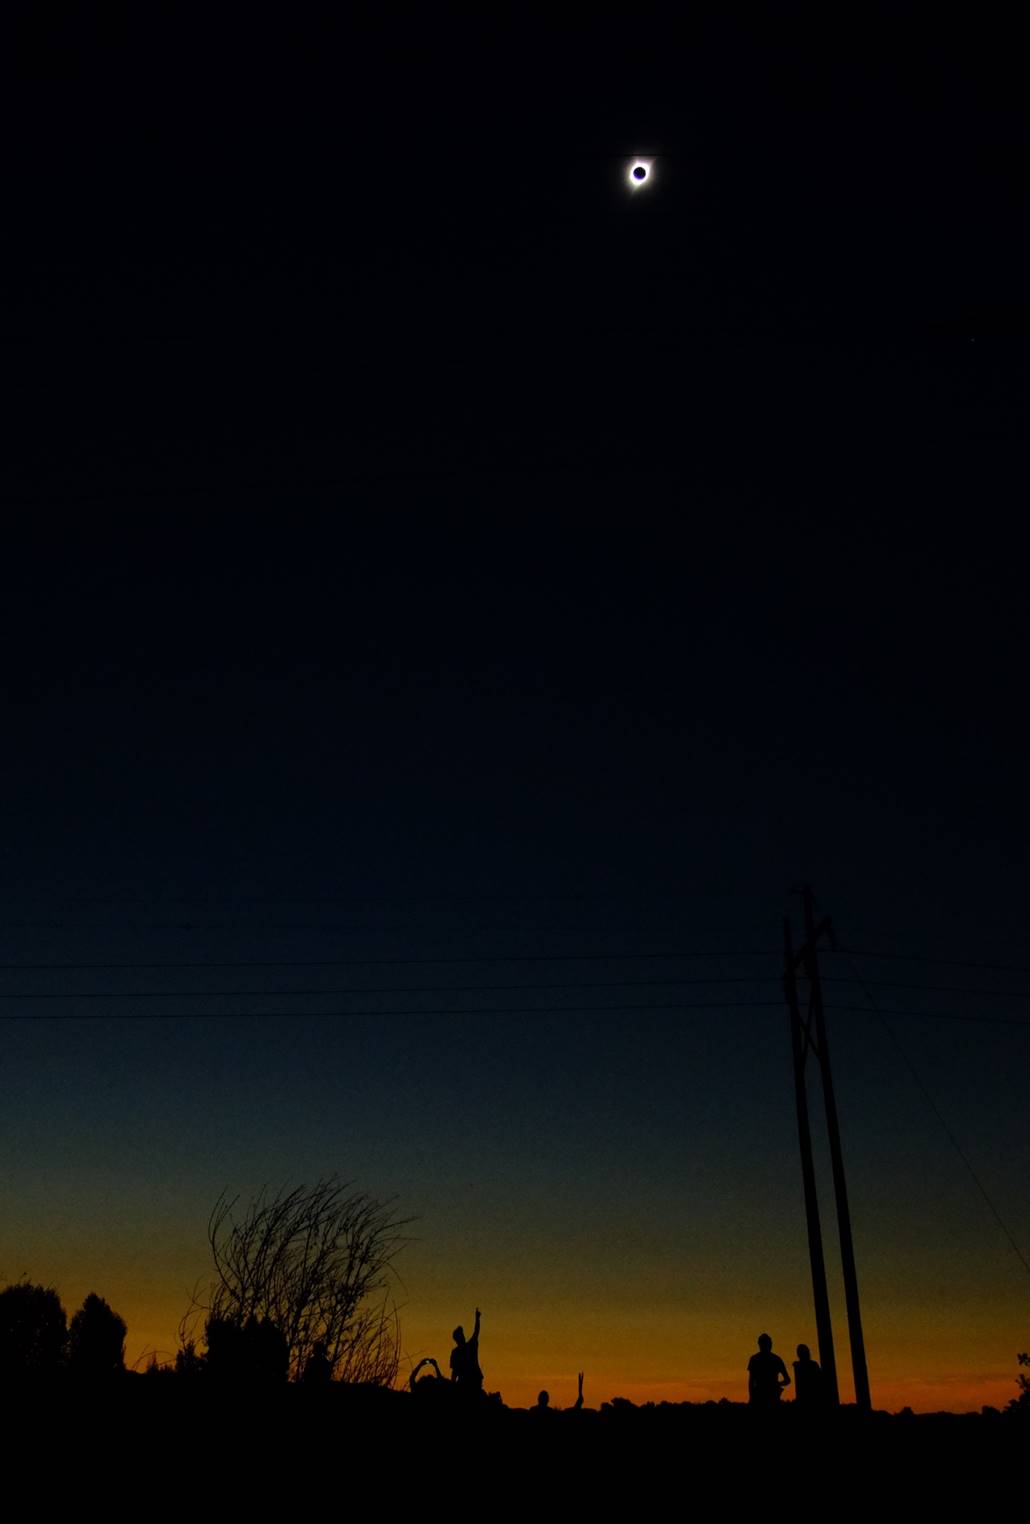
A
total solar eclipse must be among the ultimate astro’
travel experiences.